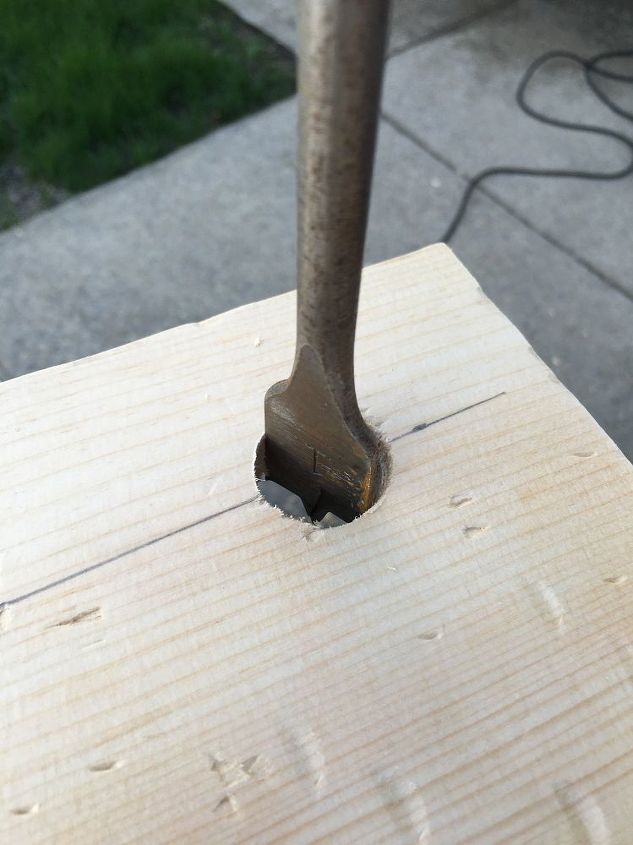
 STEP 2: Distress your wood I wanted the shelves to look worn, not new, so I took our magnetic 4 in 1 drill chuck key, attached it to a hammer, and made a bunch of marks all over the new plank of wood. When I go to stain the wood later, these divots will take the stain differently and really stand out giving the wood a more “used” feel.
 STEP 3: Cut your shelves Decide how many shelves you want and using a table saw, (or the friendly associate at your store to cut the wood on-site), cut your shelves to size. We decided on (5) 12″ x 14″ shelves.
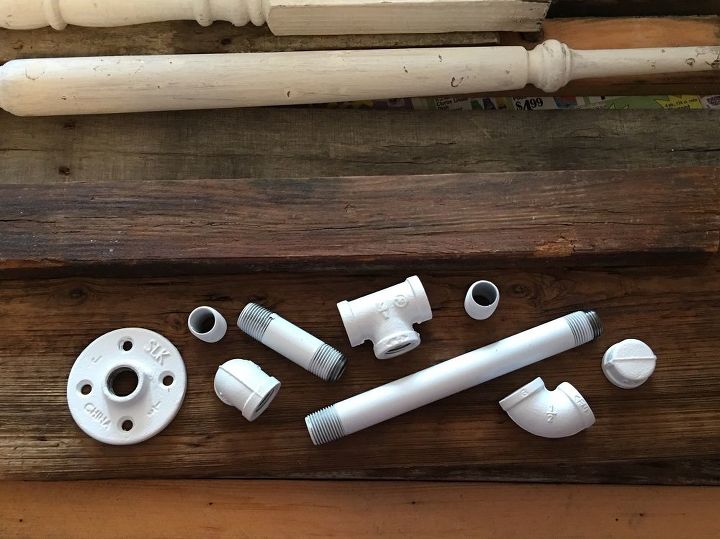
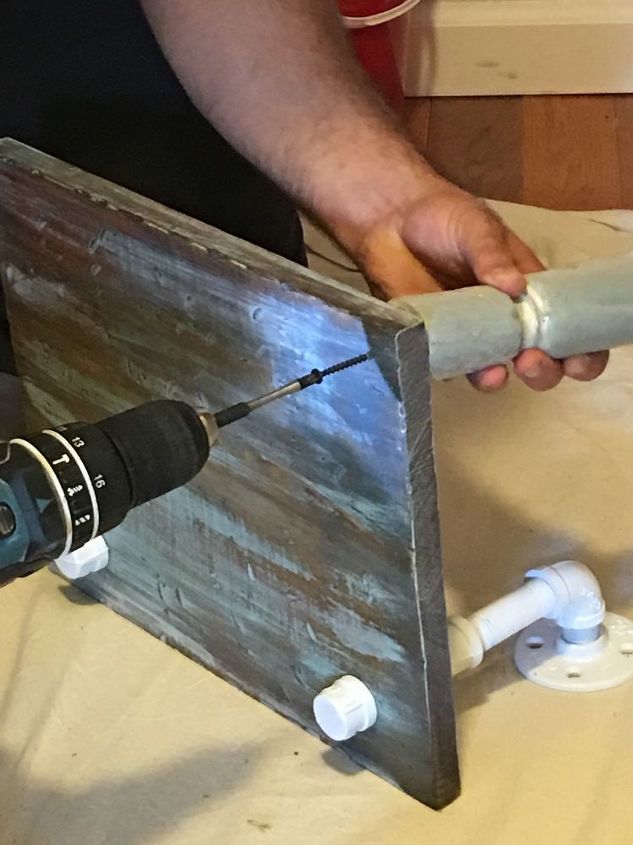
 TEP 4: Plan how to set up your pipes To really secure this unit to the wall, we decided to use plumbing pipes and fittings to mount the top three shelves. You can do this a number of ways, but after playing around with a few versions, we decided on 3 units that included a flange, (2) 90-degree elbows, a tee, a nipple, a cut pipe, (2) close nipples, and a cap. I’ve been known to play “legos” at my hardware store figuring out how to mount different projects with plumbing pipes and fittings. Have fun with this step. I then spray painted the fittings a glossy white to fit the decor of the hallway. You can leave them as you buy them or spray paint them to fit your decor!
STEP 6: Stain your shelves I decided to stain my planks of wood first with Minwax ‘Special Walnut’.
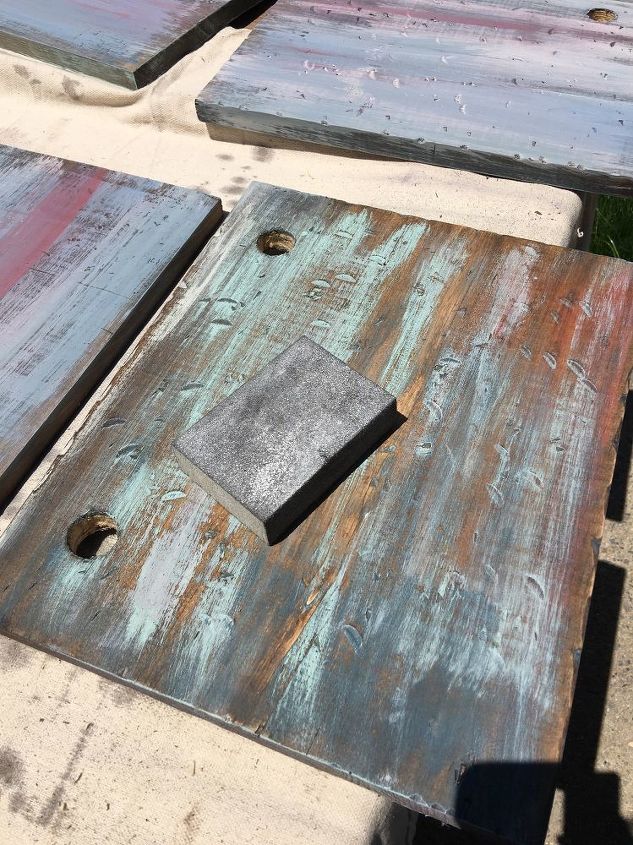
 STEP 7: Add layers of chalk paint I then went to town creating layers of chalk paint. I let each layer dry completely before applying another layer of color. When I was creatively satisfied, I took sand paper to my board and sanded random areas, allowing each layer of color to show through. This will give my unit an artistic and perhaps “reclaimed” and rustic feel. The wooden spindles I’m using I picked up for free from a local salvage store. They already looked worn and chippy – perfect for this project. You can then apply a couple coats of polyurethane to protect the wood.
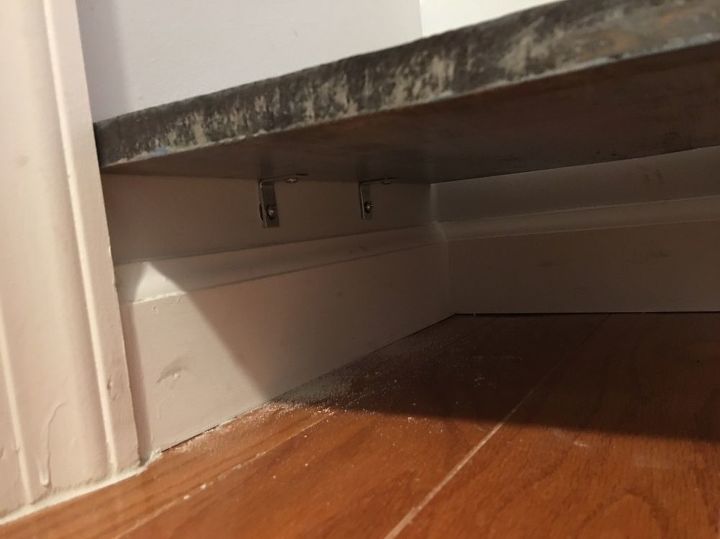
 STEP 9: Start assembling your shelves It’s time to assemble this shelving unit starting from the ground up. The bottom two shelves are low to the ground, so you won’t be able to see how they’re mounted to the wall. Using (2) 1″x1″ corner braces, these two bottom shelves will be a sturdy base for the rest of the unit.
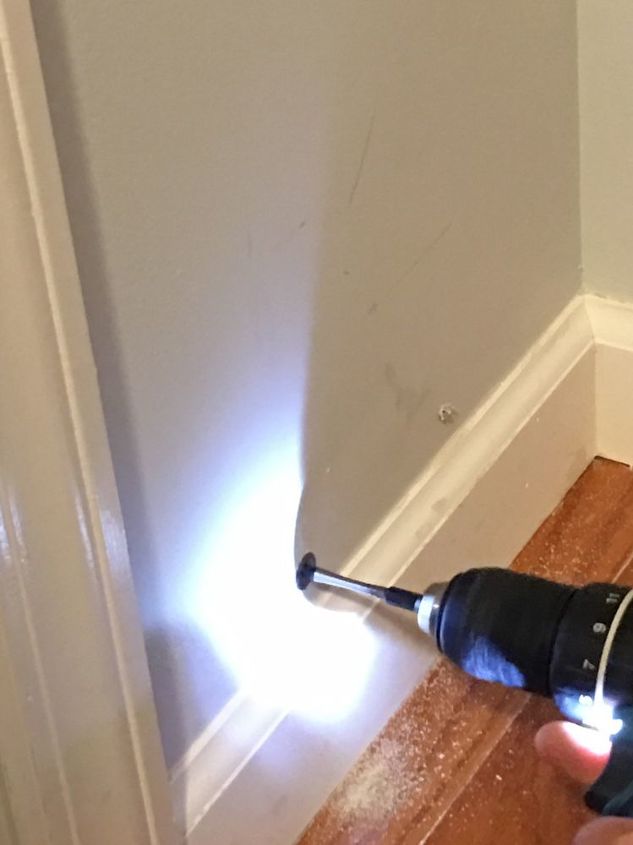
STEP 10: Install your wall anchor Align your first shelf to your liking, drill a pilot hole, and install the correct anchor for your wall material.
 STEP 11: Secure your first shelf Secure your first shelf to the wall using the corner braces.
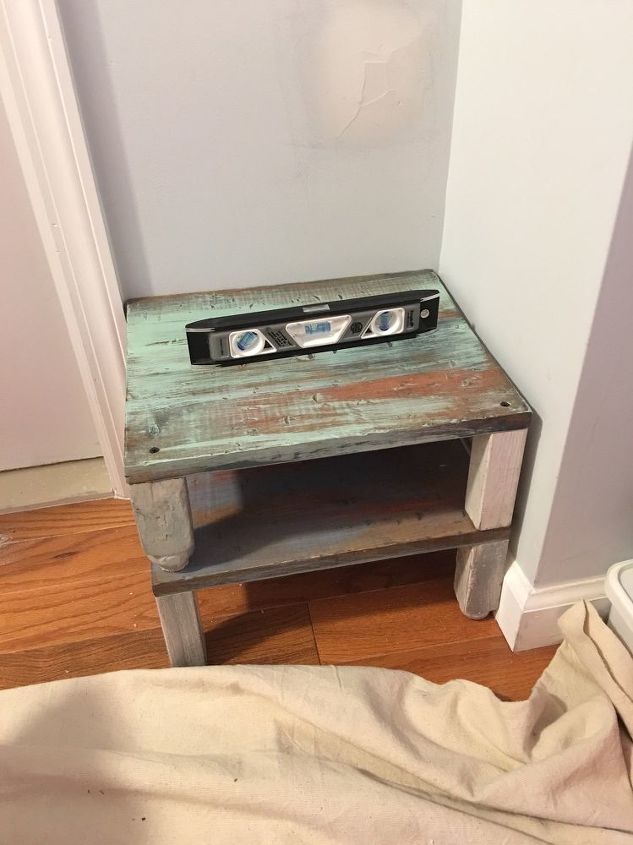
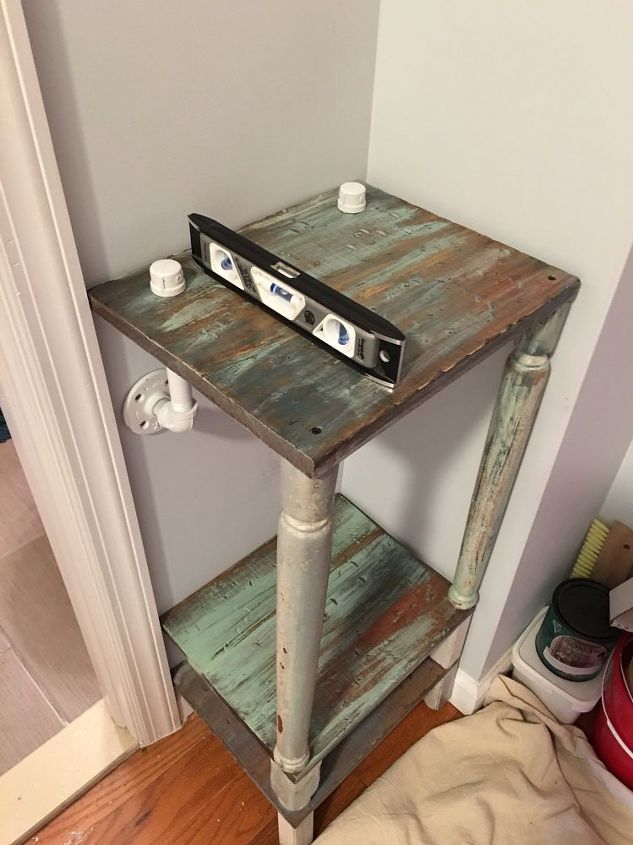
STEP 12: Add the next shelf Make sure your shelf is level before you proceed.
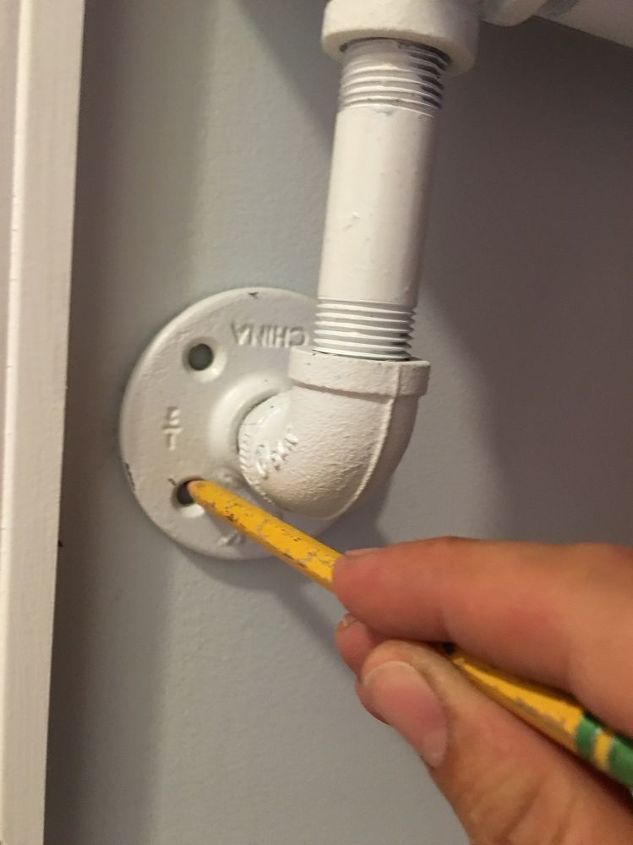
 STEP 13: Mark the spot for your plumbing mount Once our two bottom shelves were secured to the wall with their corner braces, it was time to mark the spot for our custom plumbing piping mount.
 STEP 14: Add the rest of your shelves Again, drill pilot holes, insert heavy duty anchors, and mount the unit to the wall. Repeat this step for the rest of your shelves, making sure each shelf is level before you hand tighten the screws with a screwdriver.
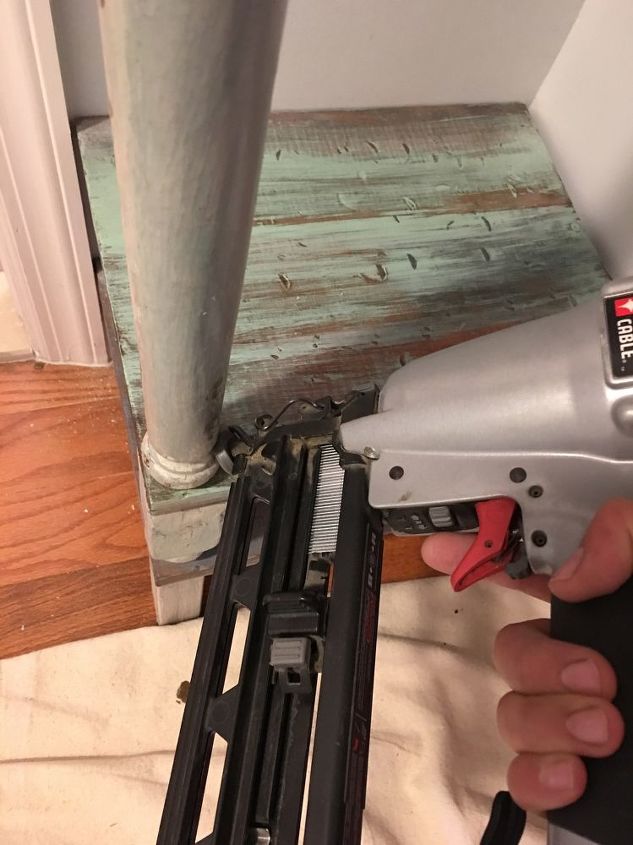
 STEP 15: Secure the spindle legs For our final step, we secured each spindle to the shelf below it with a finish nailer and 1 – 16 gauge nails.
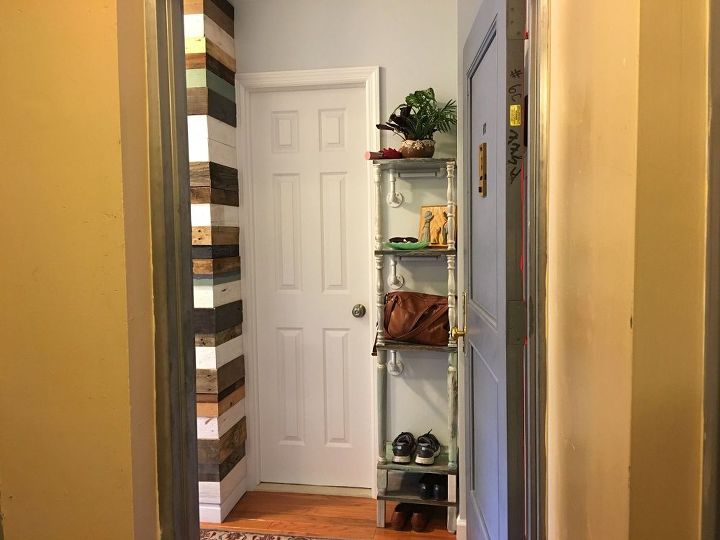
It turned out better than we hoped. It’s incredibly sturdy and has loads of charm! Definitely, a one-of-a-kind piece that you can customize to fit your space!
Want more details about this and other DIY projects? Check out my blog post! GO