 Since the panels are plastic, they work well on ceilings in areas that get high humidity such as bathrooms with showers. Since they aren’t real tin metal tiles, you don’t have to worry about them rusting.
The first step was marking the center of the ceiling in both directions.
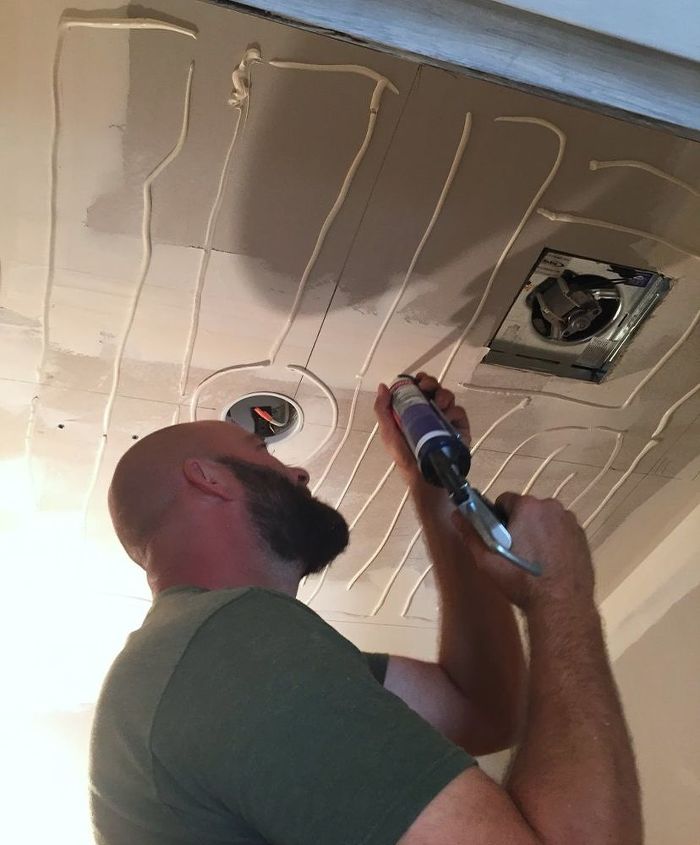
After that, we applied the adhesive to the ceiling. Or you can apply it to the back of the panels instead.
Instead of cutting out the holes for the ceiling box and fan ahead of time, they were cut with a razor knife once the glue had time to set. The outline of the boxes was easily felt through the panels. Be sure to cut off the power before you do the cuts.
 *Many have asked if you can apply these faux tin ceiling panels over popcorn ceiling. According to the manufacturer, yes you can! The popcorn ceiling must be clean and low-textured. For best results, prime the popcorn ceilings first. They also recommend using more adhesive in large dollops to the back of the panels. This will help to self-level them. Their recommended adhesive is Locktite Powergrab for panels which sets quickly and is waterproof.
*The cost of our project does includes the (2) 2′ X 4′ panels which were about $20 each and the adhesive, both from Amazon (links are below before you get to the comments).
The 3/4″ wide X 1/2″ thick trim around the panels was made by ripping down a board we had in the garage into strips, so I didn’t include that in the cost.
Our ceiling / powder room is 4.5′ X 5′ so it was about $2 per square foot.
Some of the other commenters said they’ve seen the panels at Menards and online at Home Depot. You can do a search for “glue up plastic tin ceiling panels” to make sure you’re getting the best deal.
 There’s a close up picture of the ceiling and more details on how we installed the panels on our blog.
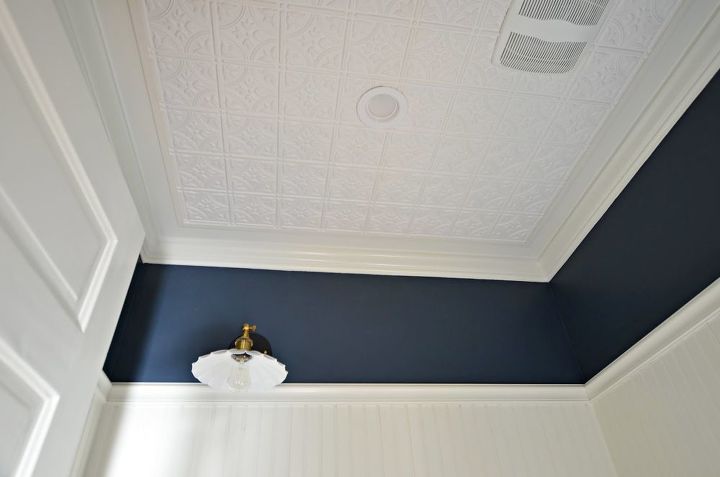
AFTER- Instead of running the faux ceiling tiles all the way across the ceiling, we left a 5” gap from the edge of the wall. We then trimmed it out with 3/4″ flat trim and added the final touch, crown molding. It gives the illusion that the crown molding is taller. I really love the vintage feel it gives the room!
To see the powder room once we finished everything and got it decorated by clicking here to the room reveal.
Want more details about this and other DIY projects? Check out my blog post! GO