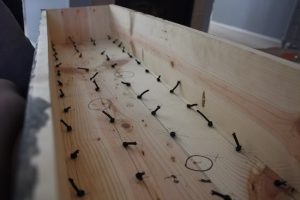
 We drilled holes in the light box for where each bulb would go,
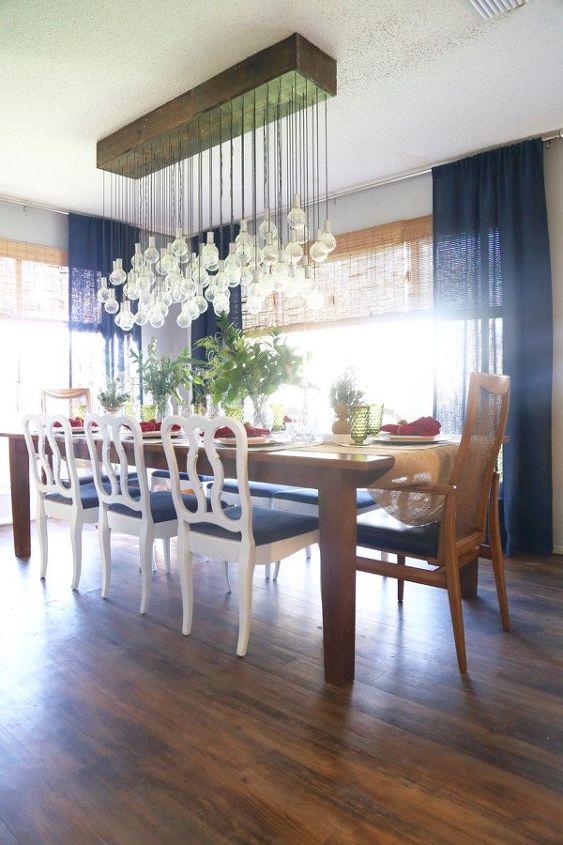
and added top that was similar to our electrical wire to each hole with a non-working bulb. The ropes are various lengths, to add to the random look of the fixture (to see all the details of how we determined lengths and what we used, see the full post).
Then, we added in the working lights and tested it all out. We went ahead and hung the light at this point, and added the non-working bulbs afterwards. We added the other bulbs by simply threading the faux sockets through the rope and tying a knot to hold them in place, then we added a dot of superglue in the faux socket and pushed the bulb up into it.
We enough glue to hold them in place, but not so much that we can’t take them out and trade them for one of the working bulbs if they burn out! We basically have a never-ending supply of lightbulbs waiting to be rotated!
Once we added all of the bulbs in, we made a few adjustments in length of the rope in areas that looked “off” to us.
For all of the details, materials list, and more photos of the finished product, you can click through to the blog post!