 How smart is that? Just that simple addition of a stool on this side, allow the hostess to sit on the kitchen side, handy to grab an extra item to serve for those casual meals at the island. It also lends to a nice seating for conversation with others seated at the island, instead of everyone all in a single file line on the other side.
They also were prudent to tuck shelves back inside this stool cubby, making every bit of space count in a small condo.
So that’s the ‘working’ kitchen side of the island…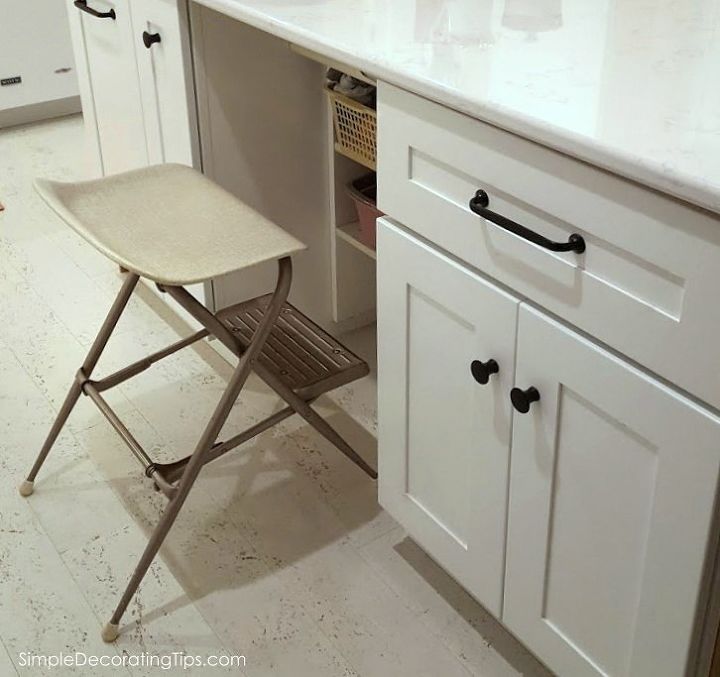 But…
But…
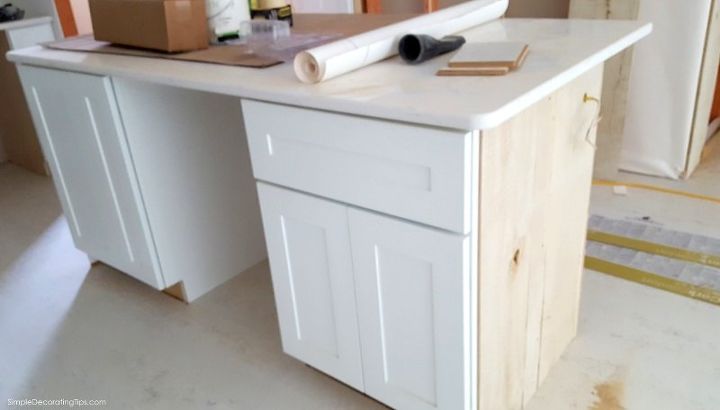
if you’ve ever ordered cabinets before, you know that when you’re placing them out in the open, instead of against a wall, you need to think about what the back of the cabinets will be treated with too.
You can order them with ‘skins’ from the cabinet manufacturer. That’s my least favorite choice. It is the least expensive, but it looks cheap too. It is just a flat ‘skin’ of the finished cabinet, flat across the back.
Another choice is to order a paneled back from the cabinet manufacture. Or sometimes it works to order some extra doors from the cabinet line that will fit on the back.
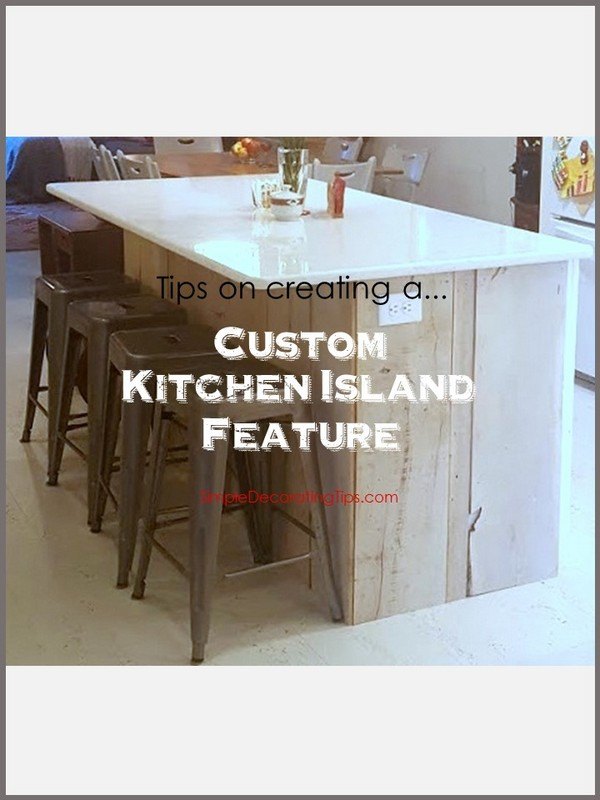
My friends (and clients) that were redoing their condo, treated their island with a rustic wood to create a custom kitchen island feature.
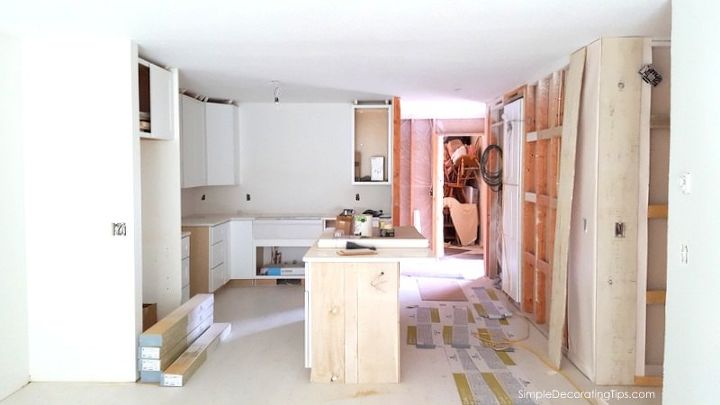 For this space, to create a custom kitchen island feature is perfect! The kitchen island is a huge part, visually speaking, of the space. It’s one of the first things you notice when you come into the condo. The island is seen from all angles and central to the flow of the space.
However, if the island was larger, more like another side of the kitchen, I wouldn’t necessarily recommend treating it differently than the rest of the cabinets. A feature, isn’t meant to be half of the cabinets, a feature is an accent of the space.
For this island, the rustic wood it got treated with, was the same whitewashed ash planking that we used on the hallway walls and a few other key spots.
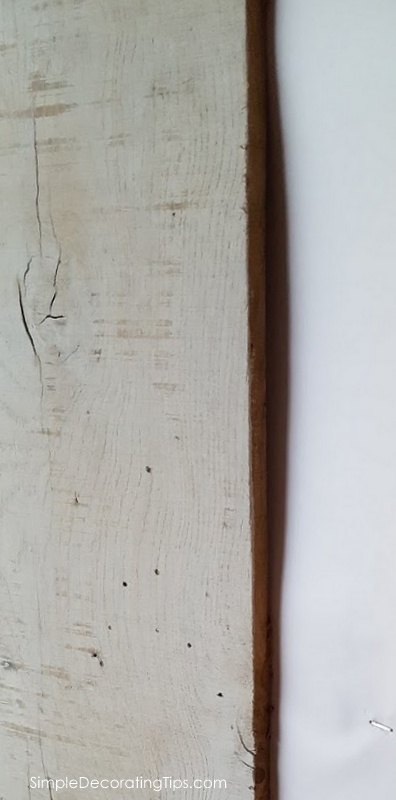
It started out with 1/2″ band saw cut wide boards.
Clean surface with a pressure washer or brush.
Mix 2 parts latex paint to 1 part water.
Roll thinned out paint onto boards
Wipe off excess paint with a rag, removing as much or as little paint as you like.
Once dry, use a palm sander to smooth the grain that got raised, revealing a little wood under paint in places.
The homeowner, who lost his sight a couple years ago, did this project with a helper, and quite magnificently I might add. Although he couldn’t see the intricacies of the wood or painting, for this project that was almost better. He put on the paint, wiped it lightly, and felt the roughness with his hand where it needed to be sanded. It made for a wonderful truly random finish.
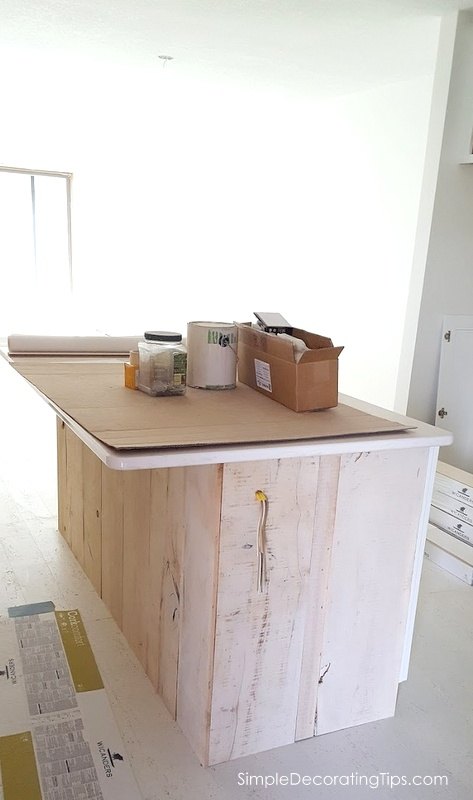 As you’ll see in a future post on the boards for the walls, and for the boards on the island, I strongly encouraged them to not have any sort of baseboard. (It does mean the carpenter needs to pay extra attention to cutting it the right length)
My inspiration for this wood treatment was from a watercolor I remember seeing at their house 30 years ago. It was a painting of a shed door and a stick holding the door shut. The shed and door were covered in wide white weathered boards.
When my friends/clients first talked to me about renovating this condo, she shared with me some pics of inspiration ideas she had been saving. One of those pics was of a Swedish looking, very clean cut, but rustic shed. At that moment I knew she still liked that look, and so I felt this was a great way to bring that feel into the space.
All that being said, a shed typically wouldn’t have a baseboard around the bottom edge, it would have the vertical boards all the way down to the bottom.
Here’s a tip for the island quartz countertop:
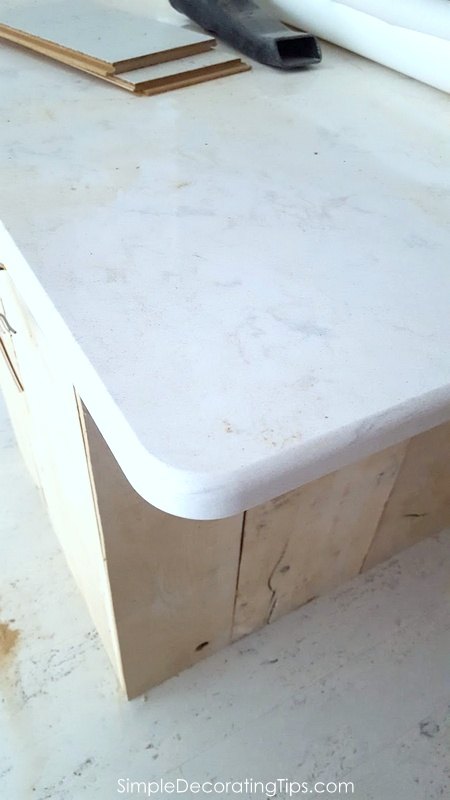
Notice the outside corner? It’s important to do rounded corners. Just a little thing like this can save lots of bangs as people pass around and can so easily clunk their sides, or worse, little kids run around and clunk their heads… a rounded corner leaves much less of an impression than a sharp, squared off one would.
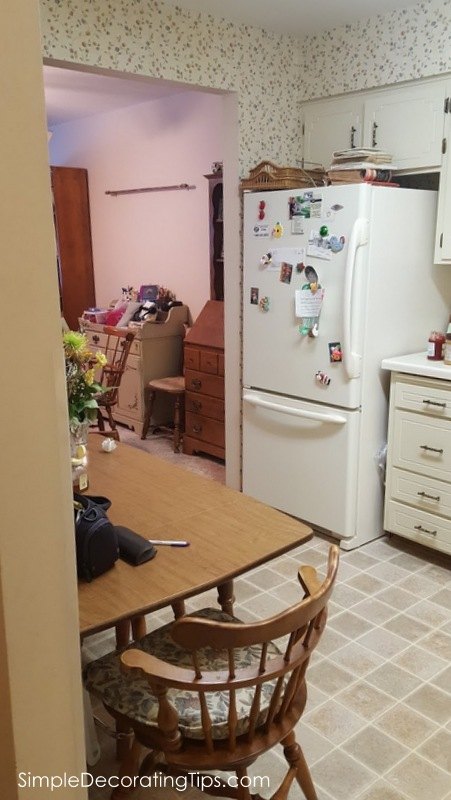
So, back to what it once was…
This was the view upon entering the condo from the front entry:
And this is the same exact spot in the entry now:
 The view is an unspoken message of welcome to this open concept space, where the custom kitchen island feature took clues from a rustic shed and beacons you to sit a spell.
If you’re interested in seeing more of this ‘Modern Swedish Farmhouse’ style condo renovation, be sure to visit my site where you can find everything I’ve written about the projects! SimpleDecoratingTips.com/condo-renovation
Want more details about this and other DIY projects? Check out my blog post! GO