 STEP 1: Cut PVC, wooden dowel & poplar board
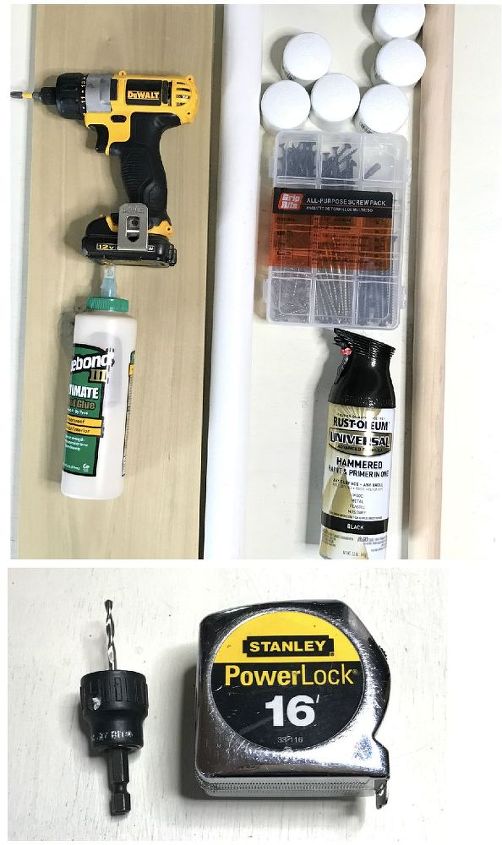
First, I cut all of the elements of my boot storage rack. Note that I made sure to square off (cut the raw, uneven end) the end of the wooden dowel before making my cuts. Here are the cuts I made for the PVC, wooden dowel and poplar board:
Wooden dowel:
10-4” pieces
PVC:
2-4” pieces
2-8”
2-12”
2-16”
2-20”
Poplar board:
Cut down to 33”
 Here is what my wooden dowel and PVC looked like once the cuts were made.
STEP 2: Make marks for boot holders
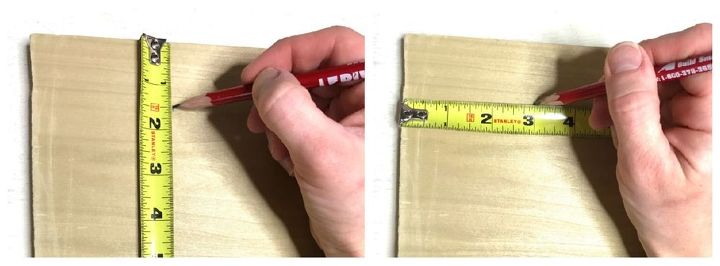
Next, I marked up my poplar board to prepare for drilling in my wooden dowel pieces. With the board laying horizontally in front of me, I marked 1-1/2” down from the top and 1-1/2” up from the bottom. Then going from left-to-right, I marked 3”, 9”, 15”, 21” 27” across the top (making sure that I was 1-1/2” from the top edge) and 6”, 12”, 18”, 24” and 30” across the bottom (making sure that I was 1-1/2” from the bottom edge).
 STEP 3: Pre-drill countersink holes
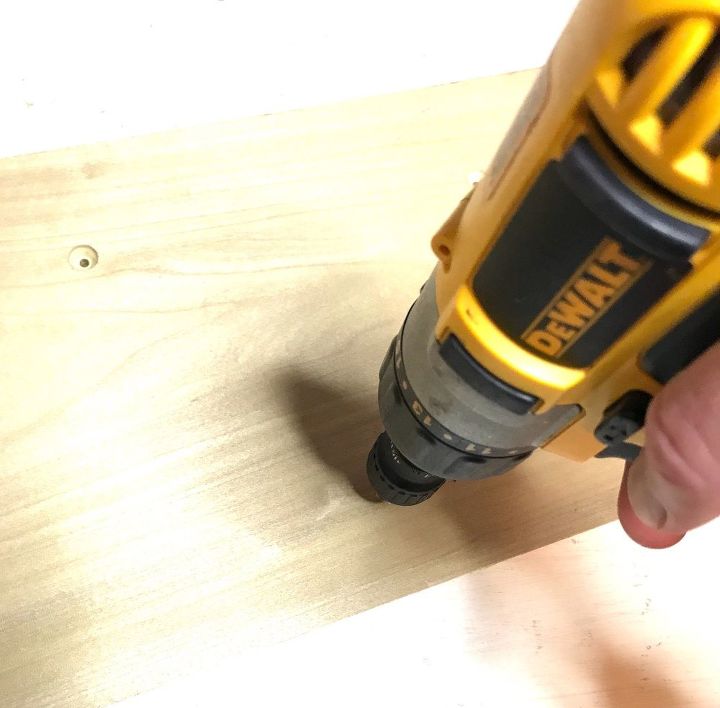
After my marks were made, I used my countersink bit to pre-drill holes where each mark was made.
This little bit is actually pretty cool because it will prevent the screws from scraping the floor once they are put in.
STEP 4: Attach wooden dowels
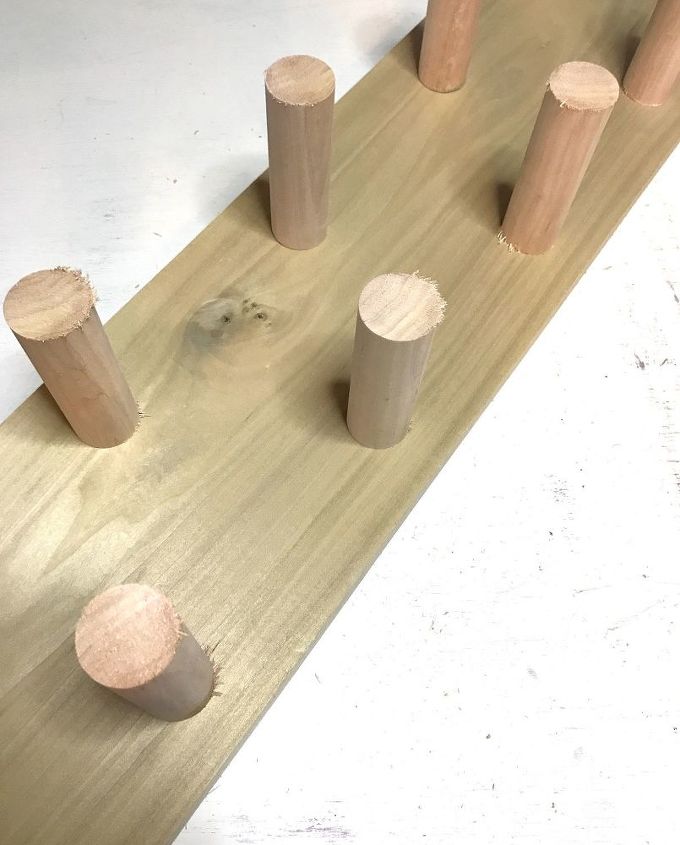
Once all of the pre-drilled holes were made, I screwed in a 2” screw just enough for the tip of the screw to come out the top side of the board.
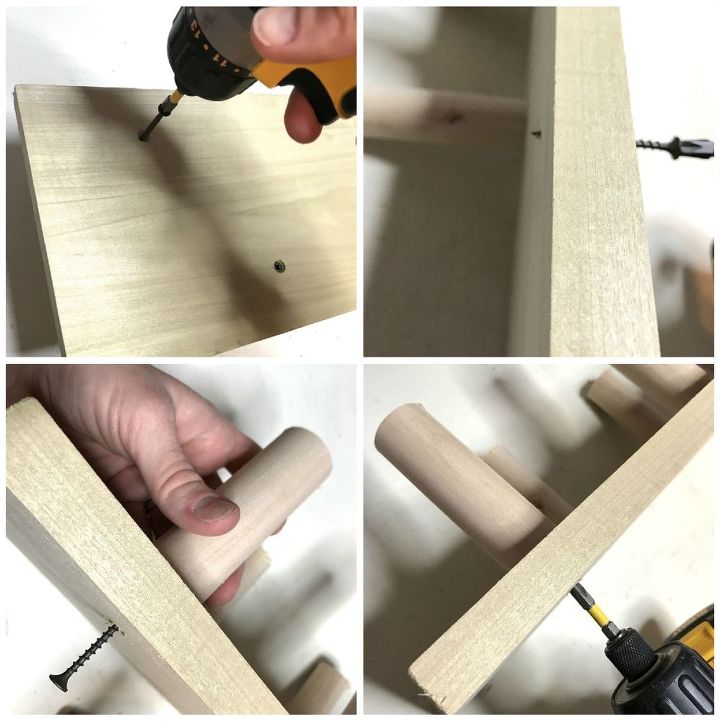
Here is how my board looked once all of my wooden dowels were attached.
 STEP 5: Secure PVC pieces
Next, I pre-drilled 2 countersink holes one side of each of my PVC pieces. I didn’t really measure where to put the holes–the first one was about half an inch to 1-1/2″ from the bottom depending on how long the piping was.
Then, I slid the PVC pieces onto the wood dowels, ensuring that each size was paired together diagonally (example: my two 4” PVC pieces went on the 3” and 6” marks of my poplar board, etc.). I secured the PVC to the wooden dowels using 1-1/4” screws. Again, be careful not to tighten the screws too much or you will risk splitting the wooden dowels.
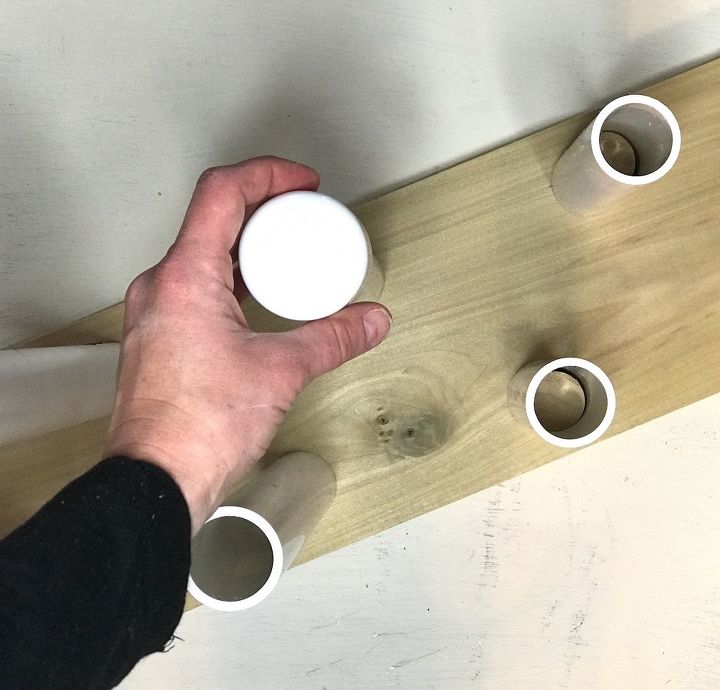
To give my boot storage rack a finished look and to also keep anything from getting inside the piping (such as spiders and other critters), I popped the caps on the tops of the secured PVC piping.
STEP 7: Paint
Finally, I used a hammered black spray paint to complete this project. I figured with how dirty boots can get, black was the best way to go color-wise. I had this hammered black spray on hand from a previous project and thought it was the perfect way to add almost an industrial look to the boot rack.
C’est fini! Here is the final product!
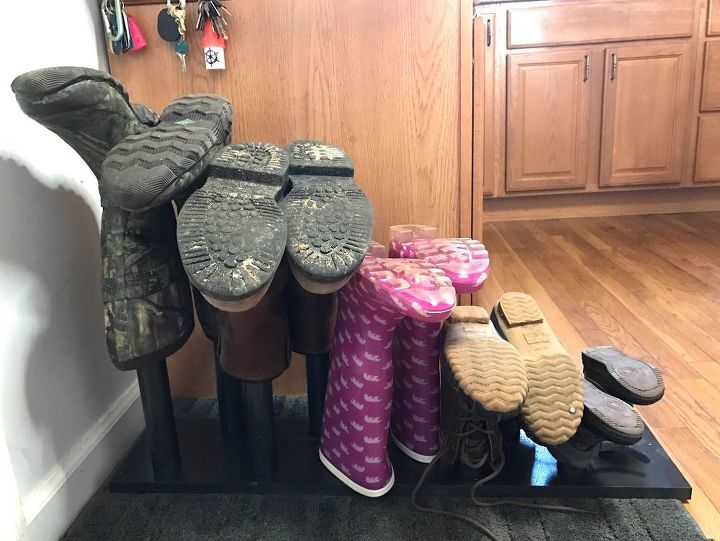 Don’t let the steps intimidate you—they did me at first since this was Rob’s design—but once I got into it, it really wasn’t that bad. If you want, you can add little felt tabs to the bottom if you have hardwood floors. I simply placed mine on a rug to keep it stationery and from rubbing against our hardwood. I’m really happy with how it came out and the fact that I can even put Bo’s little boots on the rack!
Want more details about this and other DIY projects? Check out my blog post! GO