 STEP 1: Replace shower curtain
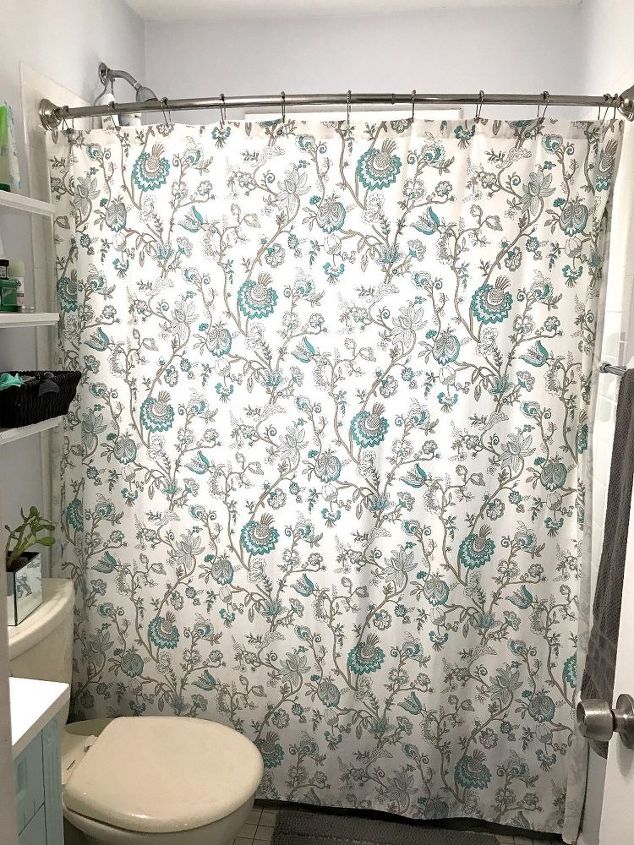
First, I took down my “old” shower curtain (it wasn’t really old but you know what I mean) and replaced it with my newly purchased one.
 STEP 2: Hang tension rod and measure desired length of valance
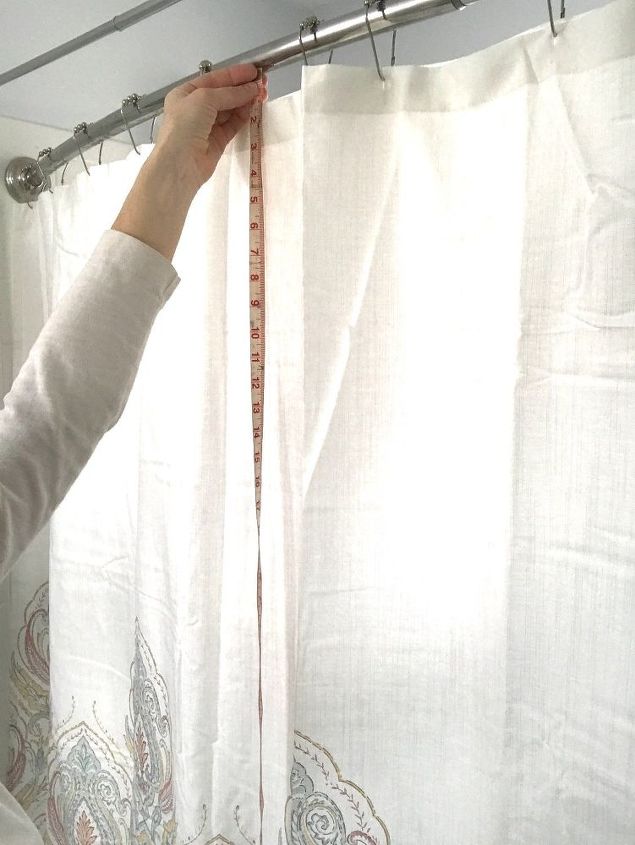
Then, I put up my tension rod above my shower curtain rod. Because I have a curved shower curtain rod, I had to make sure that the tension rod was far enough out that the shower curtain rod wouldn’t be pushing my valance out once it was hanging.
Next, I measured how far down I wanted my valance to hang. I wanted the pattern on the valance to almost meet the design on my new shower curtain so I had to make my valance longer than what a traditional valance would be. It ended up being approximately 27″ long.
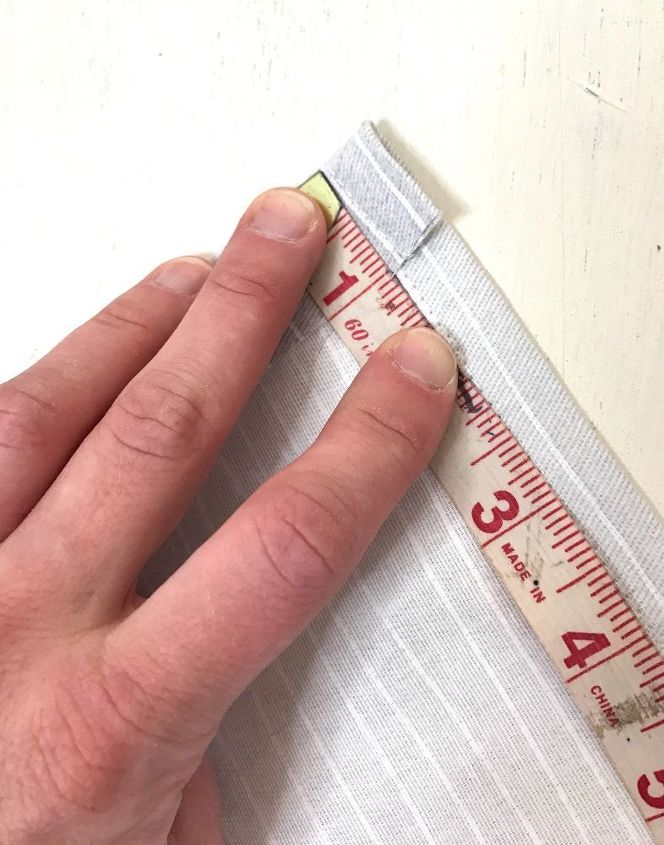
 STEP 3: Measure & cut fabric
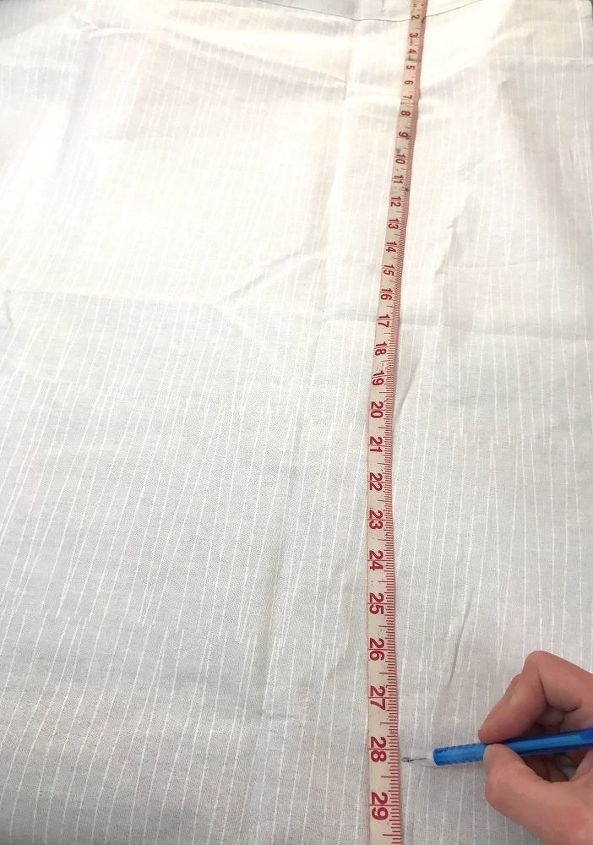
Once I had my measurement, I laid out my valance shower curtain and folded it in half (long ways so that the two ends of the top were touching) because it was so long. Then, I measured out 28″ (how long I wanted my valance to be plus 1″) and made a mark.
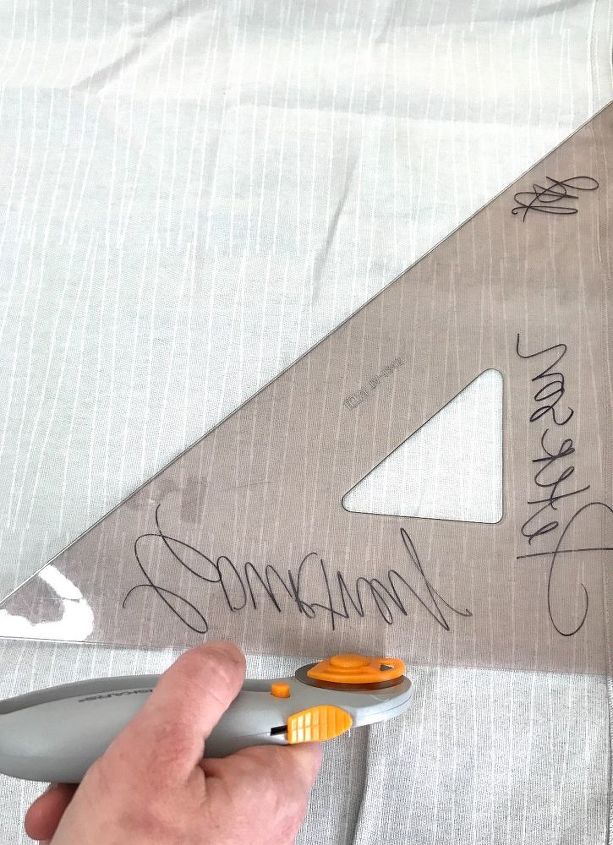
After that, I used my fabric cutting tool to cut my valance shower curtain. Make sure to cut horizontally–your shower curtain ring holes should be at the top.
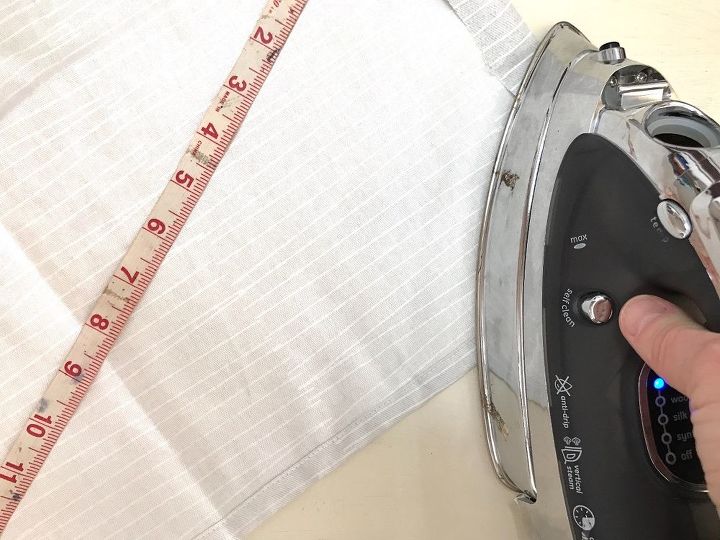
Next, I took the bottom of the valance shower curtain where I had cut and folded it up 1″ from the back…
…I used my iron to press down the fold all the way across the bottom of the valance.
Then, I took long strips of Stitch Witchery, placed them in the fold of the bottom of the balance and pressed them with my iron until the Stitch Witchery was fully adhered and there was a hem.
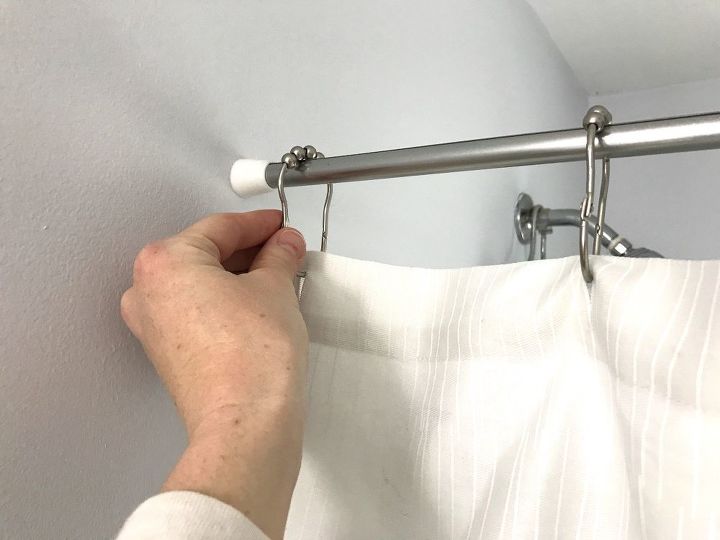
 STEP 5: Hang valance
Finally, I took my set of shower curtain hooks and looped them through the holes on the top of the valance, then attached the hooks to the tension rod.
 Here is a close up of the valance and shower curtain–if you look closely, you can see the line design of the valance imitates the fabric lines in the shower curtain. I didn’t even notice that until everything was finished and hung–I guess it was meant to be after all..?
*Note: This project cost me roughly $55 because I only had to purchase the shower curtains, hooks and tension rod.
Want more details about this and other DIY projects? Check out my blog post! GO