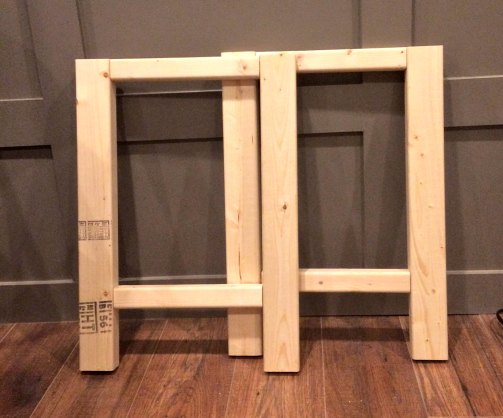
 Repeat this process to create the second half of the base…
Now on to the fun stuff! We measured the pine board and cut 6 pieces to the correct length. 6 pieces?? Why 6 you ask? The Pottery Barn table I fell in love with had a nice chunky wood top, but I couldn’t find any chunky wood like this at Home Depot! I decided to double up the 1″ thick pine by gluing two pieces together to achieve the gorgeous thickness and dimensions of the model table. Genius?!
Once we (Yes I’m still using we to reference Jason) had the pieces cut, we applied plenty of wood glue (We used Gorilla Wood Glue) and clamped a second piece to it.
When we had all the pieces glued and edges cut straight I (I actually mean me here!) arranged the boards in an order I liked the look of. I tried to make sure I had plenty of knotted bits, I think it makes the wood look very rustic! With some more glue and clamps I joined the 3 pieces together to make one chunky table top.
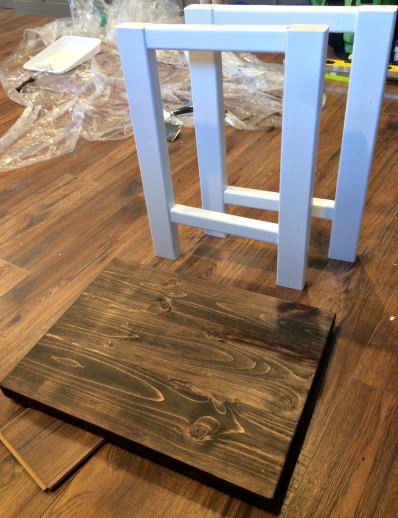
 I applied the stain using a foam brush, let it soak in for 10 minutes and then wiped it off with a rag. For the legs I painted them with a foam roller. It took about 3 coats in total.
To attach the top we pre-drilled some pocket holes in the back of the table legs and the 2 top supports and used 2″ wood screws – 4 on either side. To prevent the legs from moving back and forth we added a small block of wood in the middle behind the top supports. Big enough to offer enough support but small enough to remain hidden. (I can add a picture upon request!)
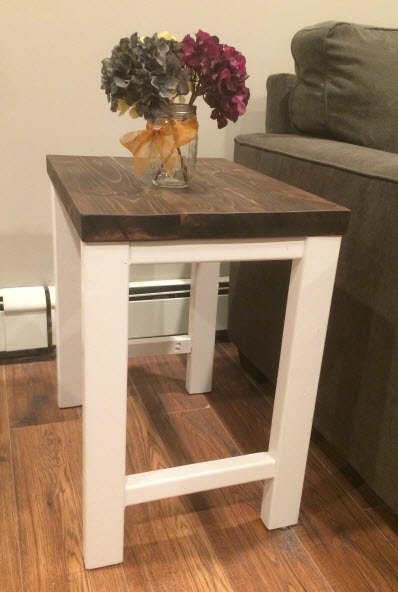
Isn’t she gorgeous!? All for a fraction of the cost!
For more detailed steps and a FREE build plan, visit our website below!
If you liked this post, be sure to visit our DIY Pub Table build!