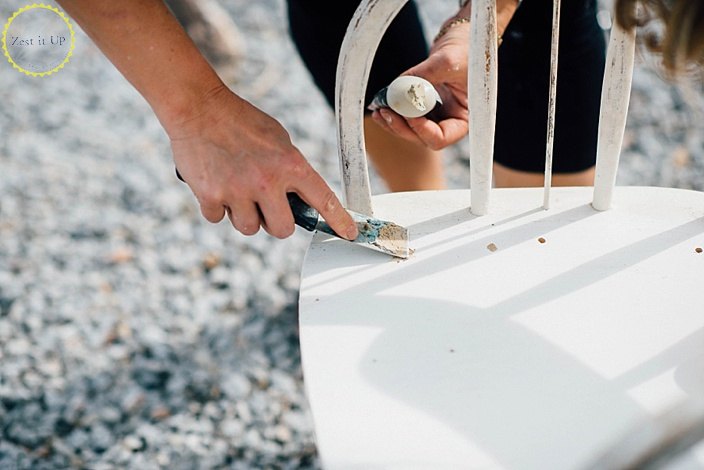
 I decided that a bit of wood putty would cover up the unfortunate holes and give my chair a much cleaner appearance. Make sure to let the putty dry. You do not want any moisture under your paint coat!
 After filling the holes, I sanded the putty down to make sure they look pretty and smooth in the end!
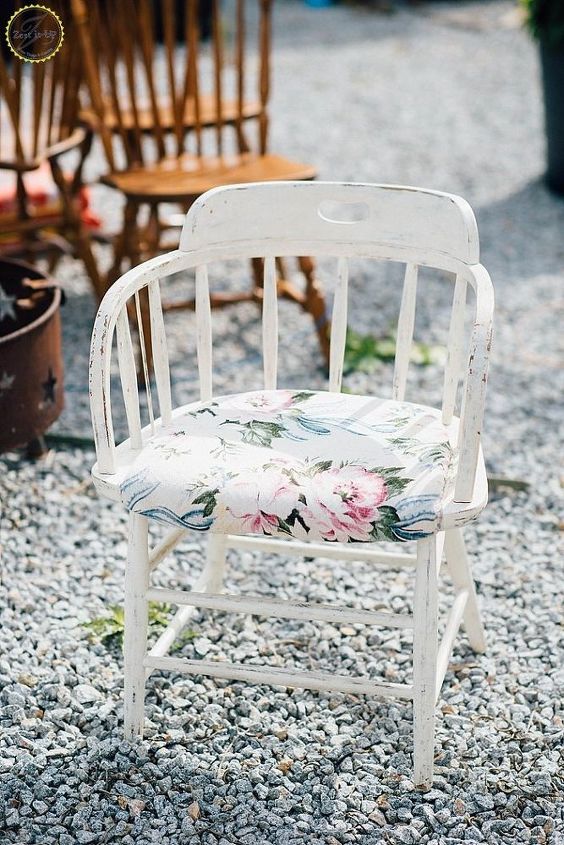
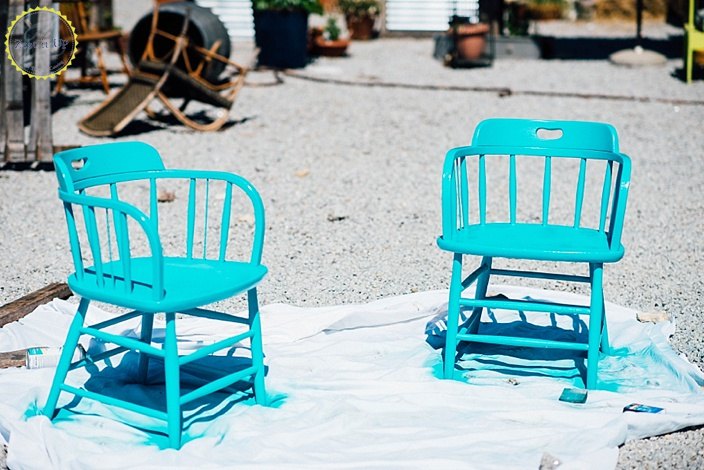
 Since these chairs were destined for my front courtyard, I wanted to use Rustoleom’s Paint + Primer solution. You can choose any color you want!
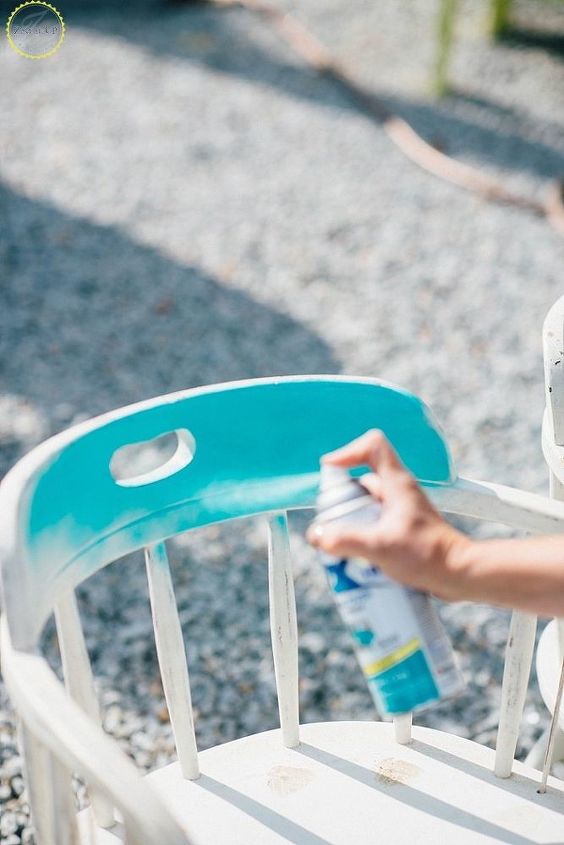
Make sure that you create multiple, light layers of paint. The result will be a lovely coverage without any yucky drips. Give the paint time to dry between light layers. I love the gloss finish of this aqua blue!
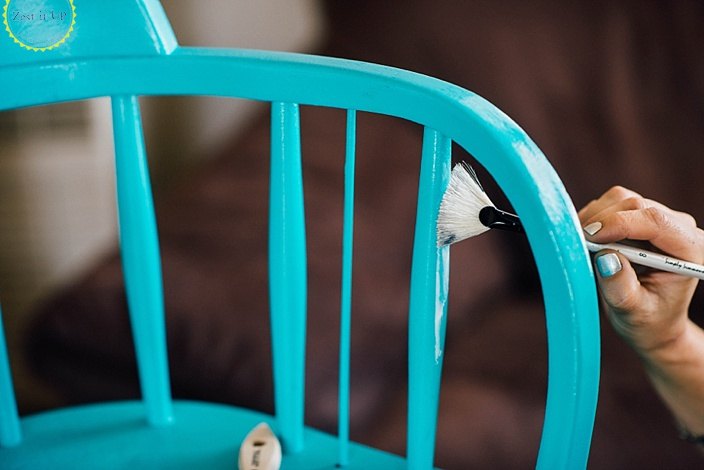 I started by applying the adhesive to a small area at first. Let it dry for a few seconds, until it becomes nice and tacky.
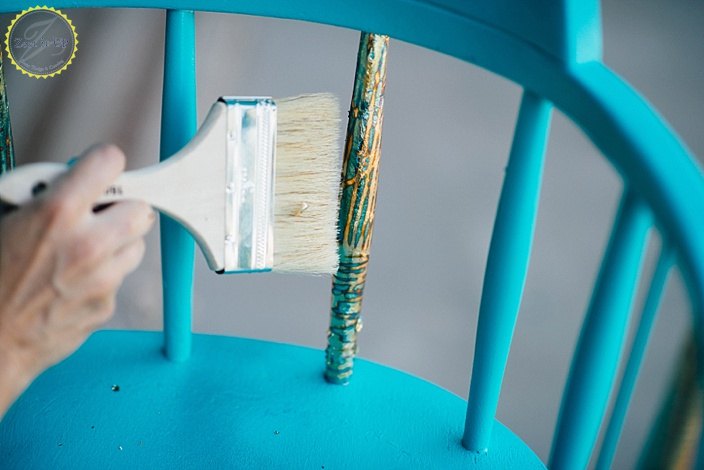
 Let the foil dry in place and then take a soft brush to gently brush away any loose pieces and to burnish the metal.
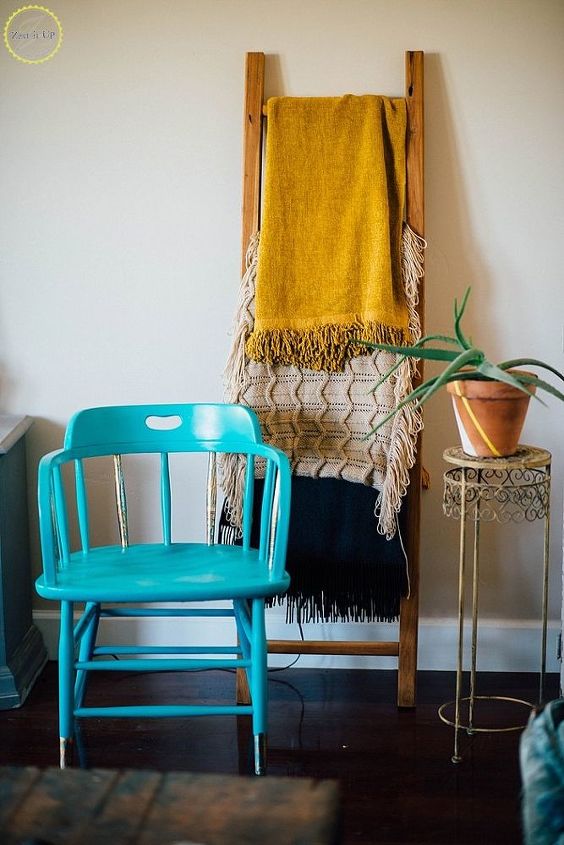
The last step would be to give it a spray of clear coat to protect the foiling. This is optional, but since these chairs will be outside, I figured a little extra protection is always welcome!
Want more details about this and other DIY projects? Check out my blog post! GO