 This is a fun little project that I found over at Alexis’ blog, Persia Lou. If you have a minute you should check out her blog. She has tons of great DIY tutorials that are easy to follow, and this is one her projects that I have been just itchin’ to try out.
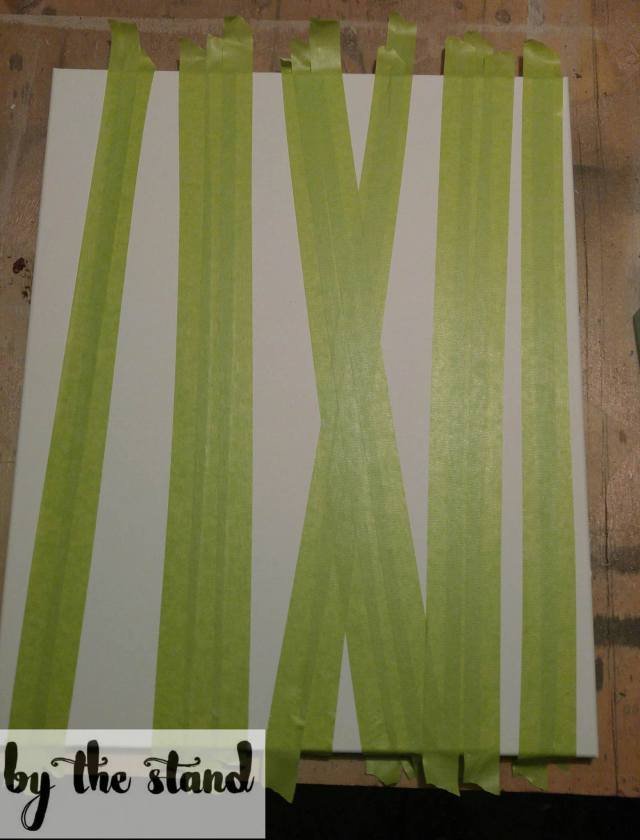
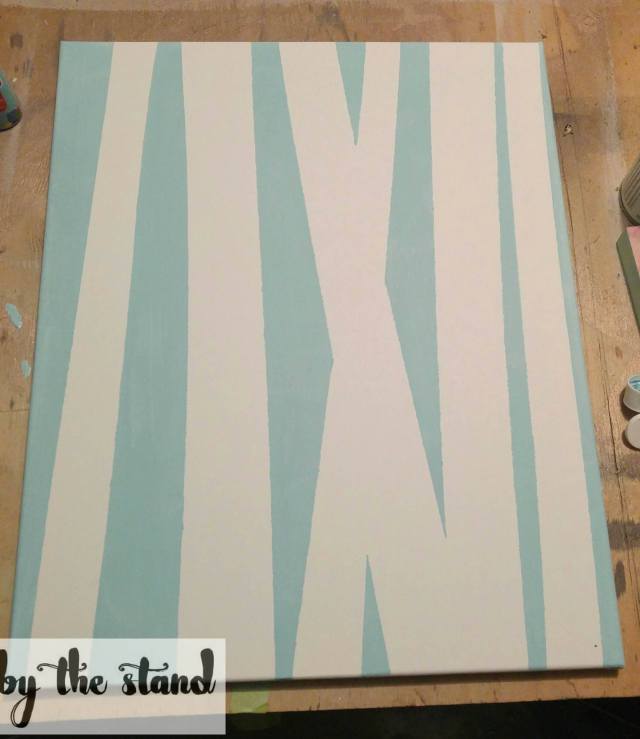
 So I started out with a canvas (mine was 16×20), some painter’s tape, and an old credit card just like Alexis instructed. Next, as Alexis instructed, I taped off the canvas where I wanted the birch trees to be… so far so good. To get tree trunks of different sizes, Alexis mentioned to double up the tape. She also showed in her tutorial to cross over the tape so that you would have a tree in the background. This is such a cool effect.
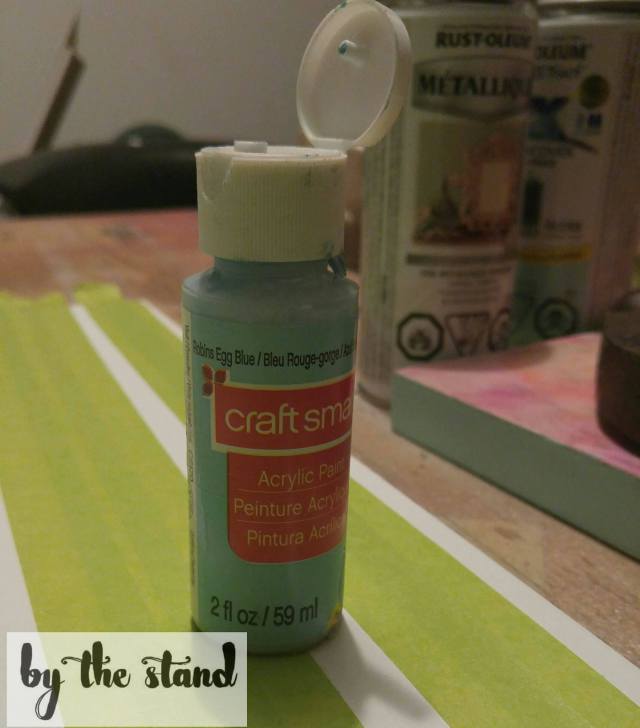
 Next, I chose the color that I wanted to be the background. I chose Robins Egg Blue in just a simple acrylic craft paint. I really liked the colors in Alexis’ tutorial, so I wanted something similar to hers.
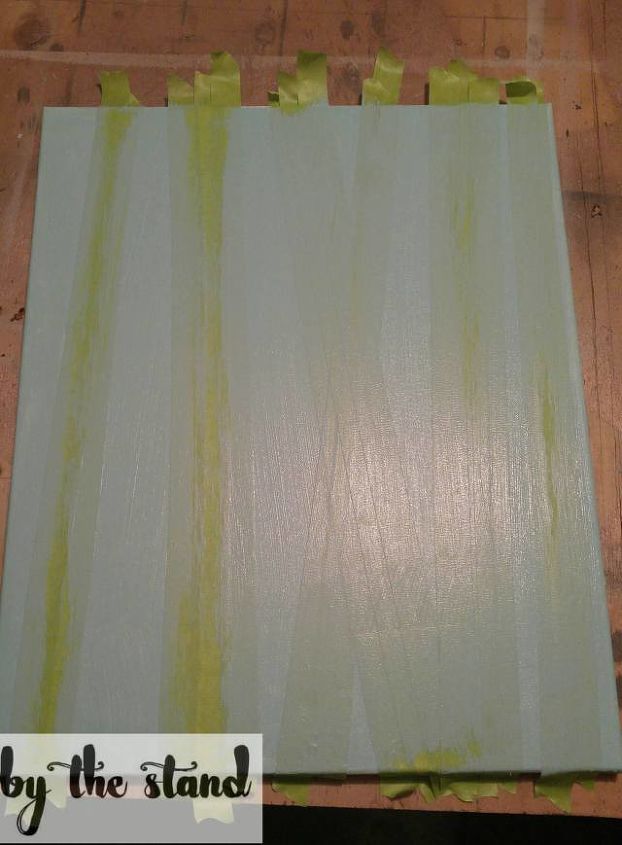
I painted over the canvas with my paint. Still on track…
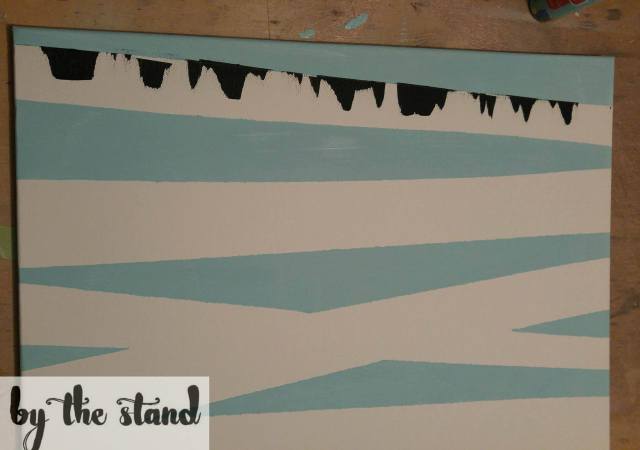 My black lines ended up being waaaay too thick, and not natural looking at all! But I carried on and thought I would get better.
(** I didn’t take any pictures of me doing the “credit card technique” cause at this point I was totally distraught** So word to the wise, when someone tells you to do something in a tutorial… just do it! You can see how to do the technique over at Alexis’ blog – http://persialou.com/2015/03/diy-birch-tree-wall-art.html)
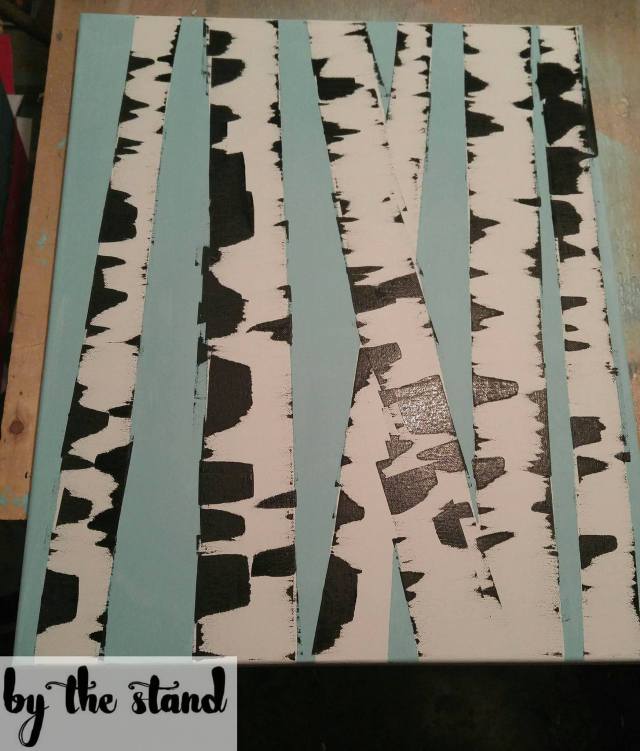
Yah, this just wasn’t going to do. So, I sat there for a minute, stared at it and seriously thought about painting over it and starting from there very beginning, but I really didn’t want to do that.
 I knew there had to be some way to get rid of the black without wrecking the entire painting. I just went with my gut and grabbed some rubbing alcohol and some cotton eye pads.
I rubbed out the areas where the black paint looked like, well for lack of a better word, crap.
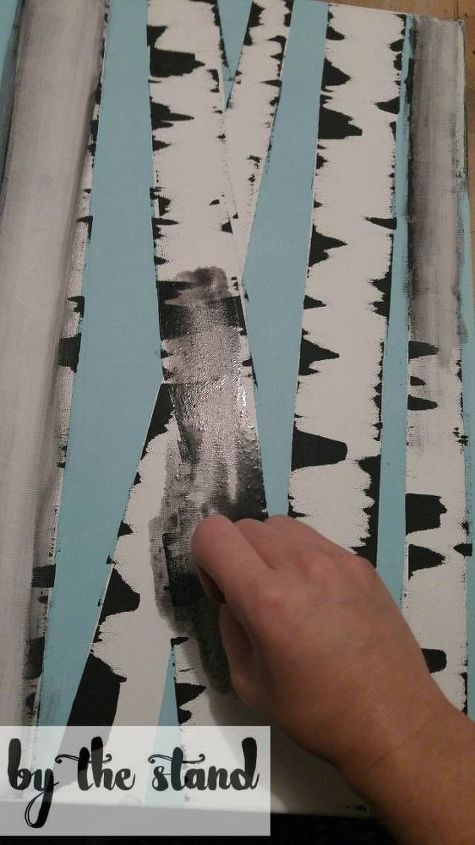
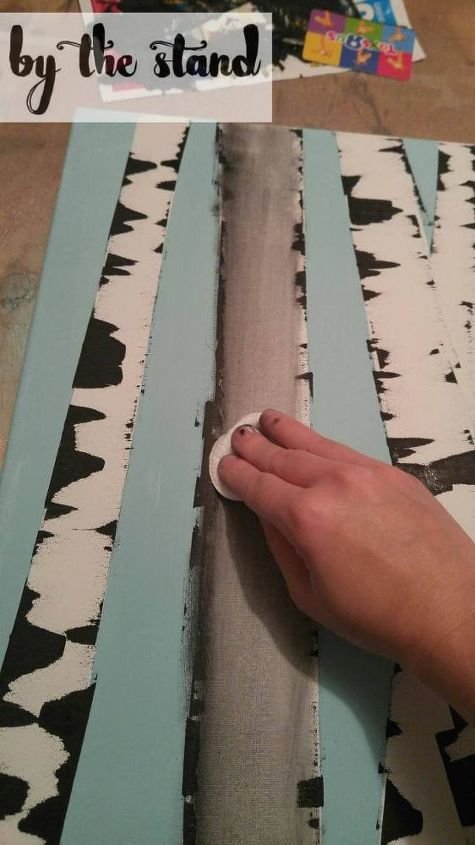 I was a little sad when I realized I would be very hard pressed to get the canvas back to white again.
But the more I looked at it, I realized that I kind on liked the grey look instead of the white. So I just went with it.
I have to say that I am pretty glad I turned this around. Now I just had to re-do the black lines again… and this time I practiced first!
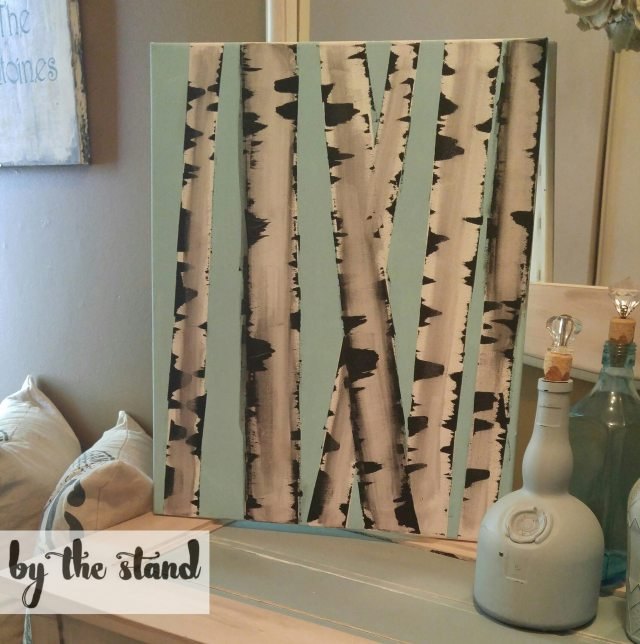
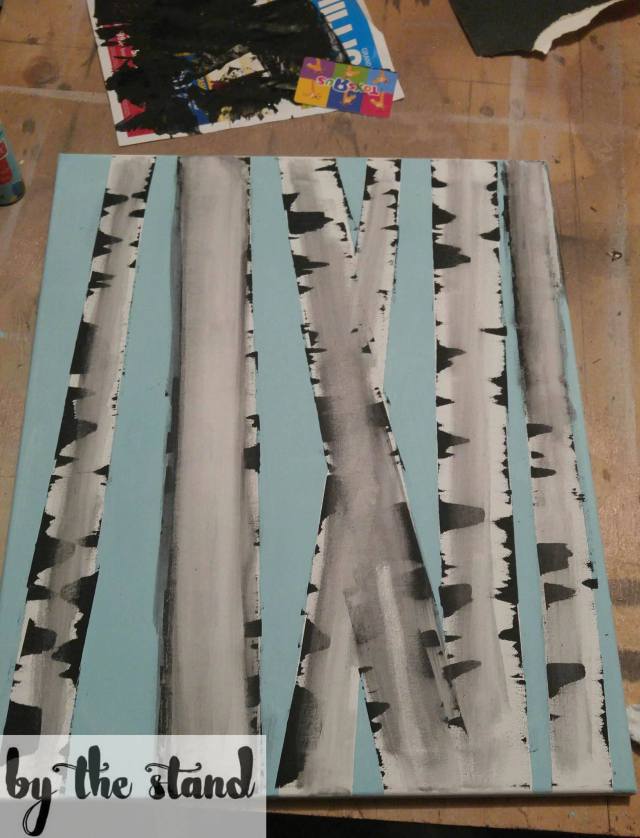 Not to bad, right? You just never know what you can do until you try!! So again, I encourage you all to get off Pinterest and start making your pins!!! 😀
 Head over to Persia Lou and show her some love as she is the original creator behind this gorgeous idea! http://persialou.com/2015/03/diy-birch-tree-wall-art.html
To see the full post check out my blog, too!
Want more details about this and other DIY projects? Check out my blog post! GO