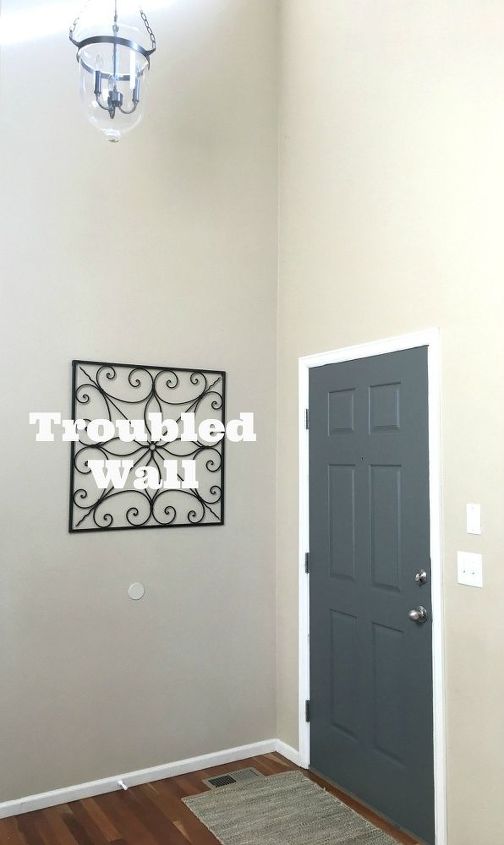
 Measure for beadboard – First things first,
pick the height of your beadboard. We went with 4′ high for two reasons. One, I know the sheets at Home Depot come in 4′ x 8′, so this would give us the most bang for our buck and would require only one sheet to do this area. And two, 4′ and then with the 6″ of trim on the top, is the perfect height for our hooks to hang out of reach of the boys (for now). So that was a super simple decision. From there, I measured my exact sizes for the beadboard. Make sure you check these measurements 1,2,3 or more times. Nothing is worse than getting home and realizing your beadboard isn’t fitting your wall because the measurements are off! I highly suggest having someone at Home Depot cut the paneling for you. For ours, I first had them cut it in half so I had two 4′ x 4′ sheets. Then left the one sheet exactly as is, and had them cut the other 4′ x 4′ sheet for the rest of my long wall and my other two small walls around it. And that was it! I now had all my beadboard from one sheet for $20! It saves so much time and you head home with beadboard that is pretty much ready to go right onto your wall (besides outlet or light switch cuts).
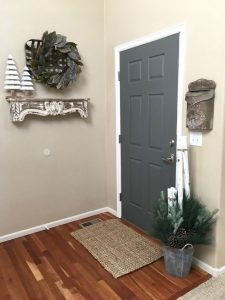
Cut in your outlets/switches and hang it – With your sheets perfectly cut, it is time to hang it. Before applying your liquid nails, I suggest putting your freshly cut pieces on the wall and making sure it is all going to line up perfectly. Once, you see all your paneling fits on your wall as you intended the fun begins! Using a jigsaw, cut in your light switch/outlets, then you are off and running. Apply a layer of liquid nails to the back of each sheet then firmly press it against the wall. I held it in place, making sure it was level and perfectly in line with our baseboard, while my husband secured it with finishing nails. We used the good old hammer and nails method! Of course it would have gone faster with a nail gun, but ours was down and out and we didn’t need many nails because we used liquid nails. The nails are just for the first 24 hours to secure it in place, but from their liquid nails do all the strong work. Side note here – if you think you would ever want to remove the beadboard do not use liquid nails. You would need to most likely re-dry wall after you removed it. Nails would be a better option if you aren’t wanting this look forever, just make sure they go into studs.