
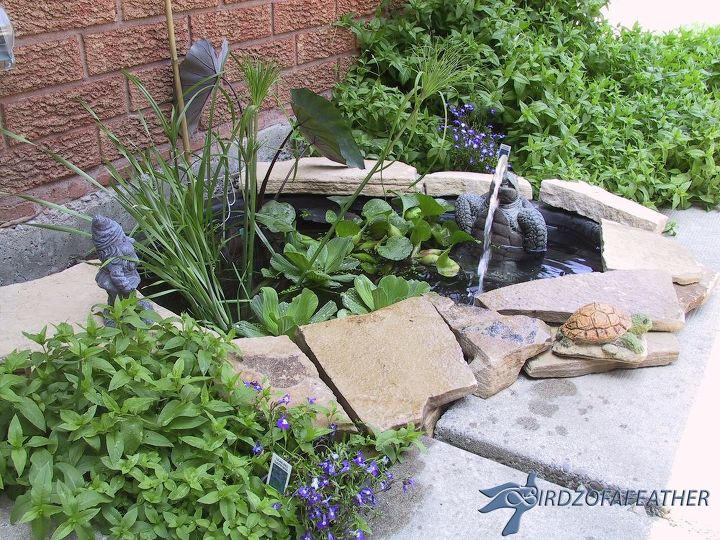
 We purchased some flagstone to hide the edges and finish it off (a few pictures follow in the next section).
Walkway Challenges
When we first installed our liner it was with the recognition that one day we would be installing new paving stones. We actually ended up doubling our work because of that; we had to re-support the pond when we updated the walkway. This is how the walkway looked before we installed the new pavers. As you can see the liner is level and sits on top of the stone slab.
 To dress is up, we bought natural flagstone and placed it all around the edges of the liner to hide it. Be sure to buy different thicknesses so you’re able to stack it up to different levels since you’ll have higher gaps in the back and side than the front where it meets up with the walkway!
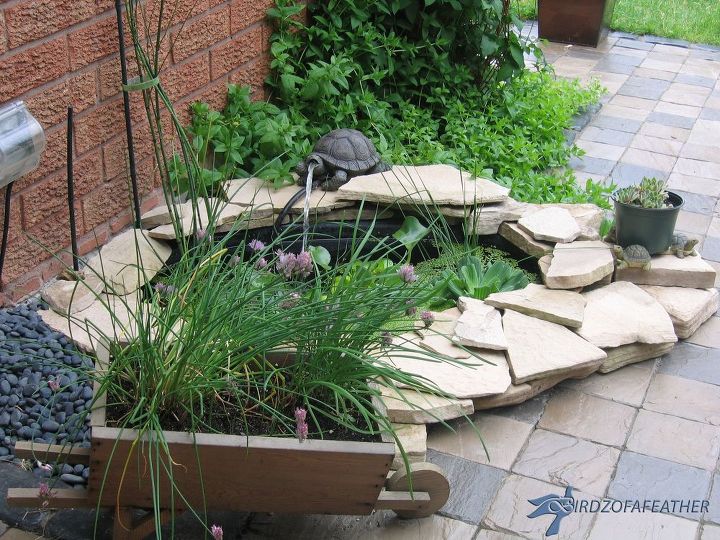
Here’s how the pond looked before we updated the walkway with new pavers. It looked quaint, but there was still lots of room for improvement; we knew we could do even better!
 Notice that the stone around the edge looks a little skimpy? That’s because we didn’t buy enough initially. It’s sometimes hard to judge how much you’ll need until you’ve got the stone on site! Oh well, just be prepared to take another trip back to the stone yard.
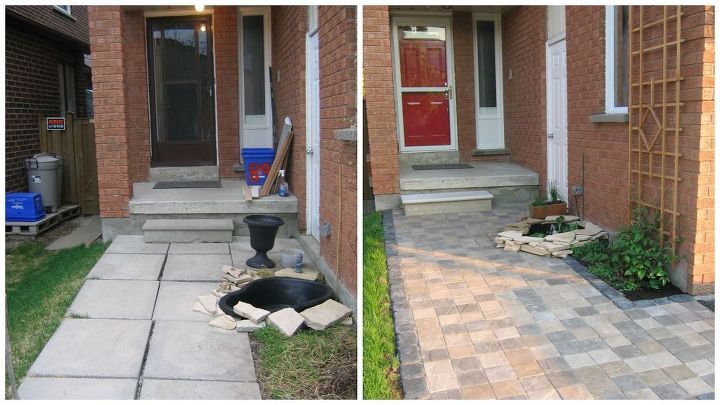
When we finally got around to updating the old stone on the walkway from concrete slabs to pavers (before and after shown below) we wanted to be able to easily pull the liner out of the hole so we could power wash it each Spring and then put it back, ready to fill with clean water.
Easy upkeep and maintenance is always an important factor to us. Our biggest challenge was figuring out how to remove the liner without disturbing the base underneath our pavers and having it all crumble into the pond each time we lifted it out.
Since our liner was already installed as outlined above, our first step was to set up string lines so we could determine the finished level of the walkway and where we needed to place concrete blocks to fall just under the lip of the liner. Then we dry fit the concrete blocks around the front edge of the pond where it was going to intersect the walkway. We needed to stack the blocks two-high in order to get the height we needed. We kept taking the liner out and putting it back in as we dry fit the stones to ensure it would sit level once the stones were in place. You might have to add some sand into the bottom of the hole at this point to make sure the liner nestles properly.
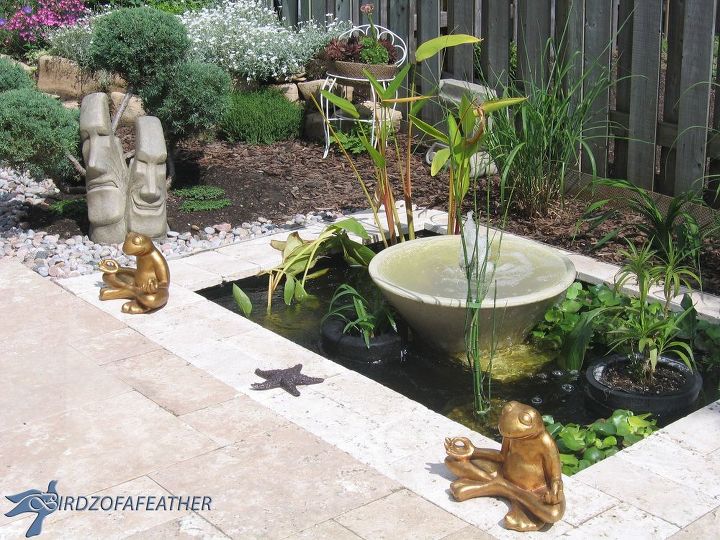
 The process will look like a mess in the interim, but stick with me here and you will end up with a pond similar to the one above!
I should mention that we ran electrical to the pond (rated and weather protected for outdoor use) so we could install a pump. If you don’t have circulating water, your beautiful pond will just be a breeding ground for mosquitos!
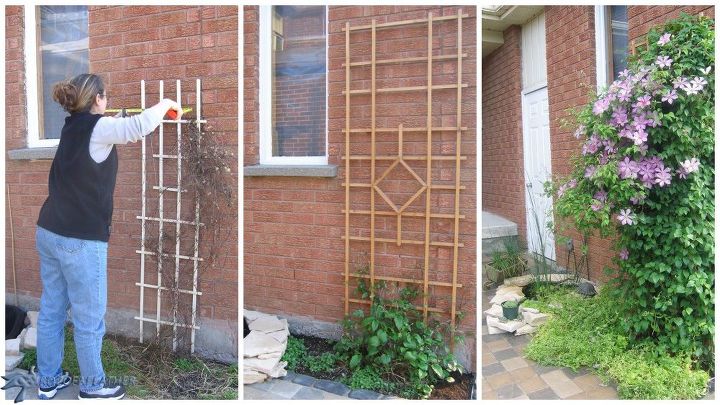
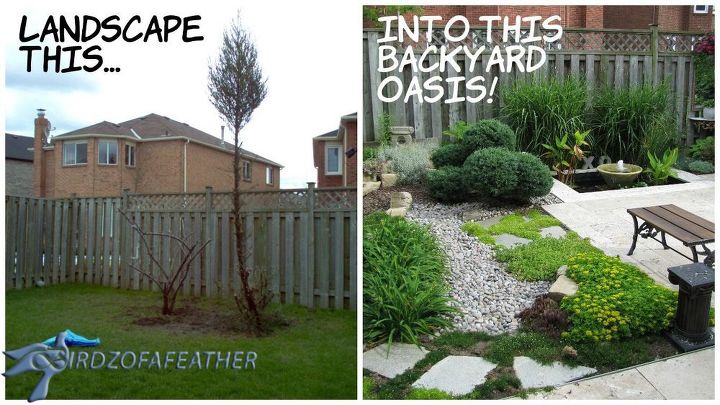
To finish off the vignette, I also built the trellis shown below. Of course, once we got started we couldn’t stop at just the front door. We overhauled our backyard too!
Head on over to Birdz of a Feather for the full tutorial (and pictures) on how to complete the water feature shown today. For other home and garden projects, follow us on Birdz of a Feather (link below this post) and right here on Hometalk. You can also follow us on:
Pinterest: http://bit.ly/BirdzPIN
Facebook: http://bit.ly/BirdzFB
YouTube: http://bit.ly/BirdzYT
Instagram: http://bit.ly/BirdzIG
If you stay tuned, we’ll have an upcoming post on how to create another soothing water feature – this time, for the backyard (sneak peak blow) 🙂
Are you ready to attempt a water feature in your own garden?
Want more details about this and other DIY projects? Check out my blog post! GO