
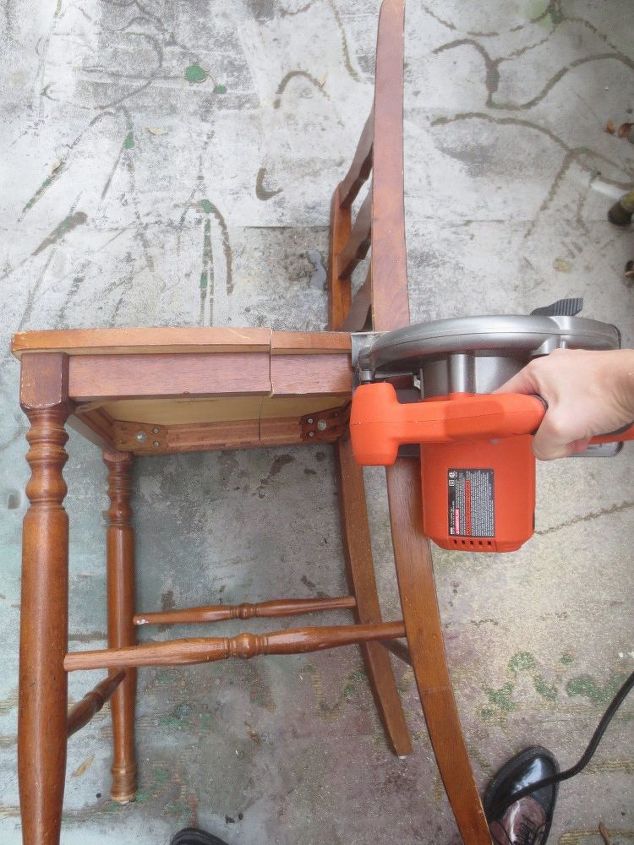
 STEP 3: Saw off the legs
Cut off the back legs of the chair as close to the seat as possible. At this point the entire back of the chair should be separate from the front.
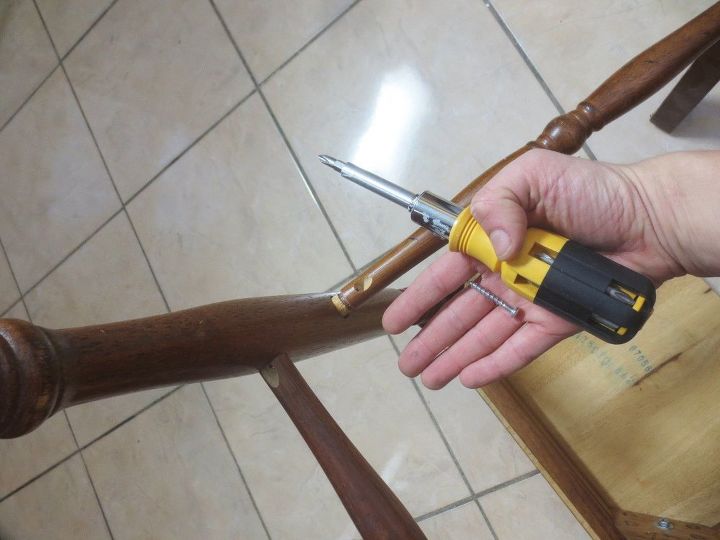 STEP 4: Take off cross beams
If you have cross beams on your chair you can remove them with a screw driver. Chairs can be constructed differently so you may have to remove them with a saw if necessary. Set these aside as you can use them later as a sort of bracket.
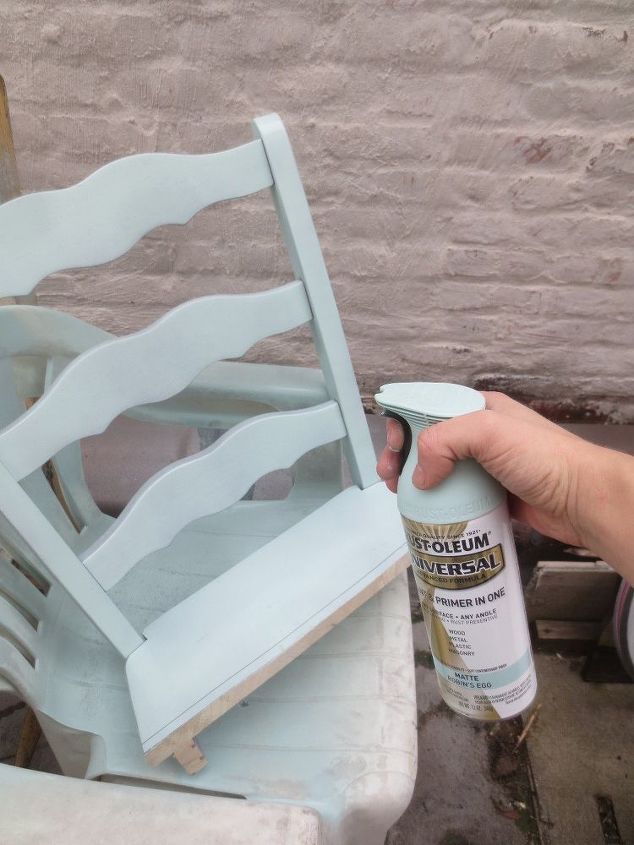 STEP 5 (optional): Paint your chair
If you wish, you can paint your chair pieces the color of your choice at this point. (Remember to paint the rails if you are using them.) I used Rustoleum’s Universal Spray Paint in Matte Robin’s Egg. It’s a beautiful color, and it goes on evenly.
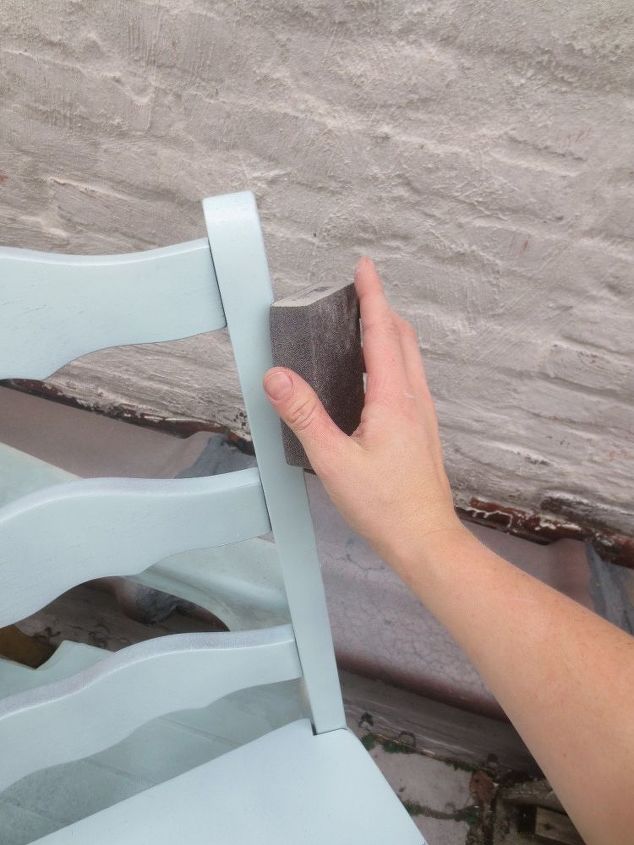
Once your paint has dried, use a sanding block to rough up the edges of the chair pieces and allow the wood color to peak through from underneath. This is a distressed look, and it gives it more of a farmhouse appearance.
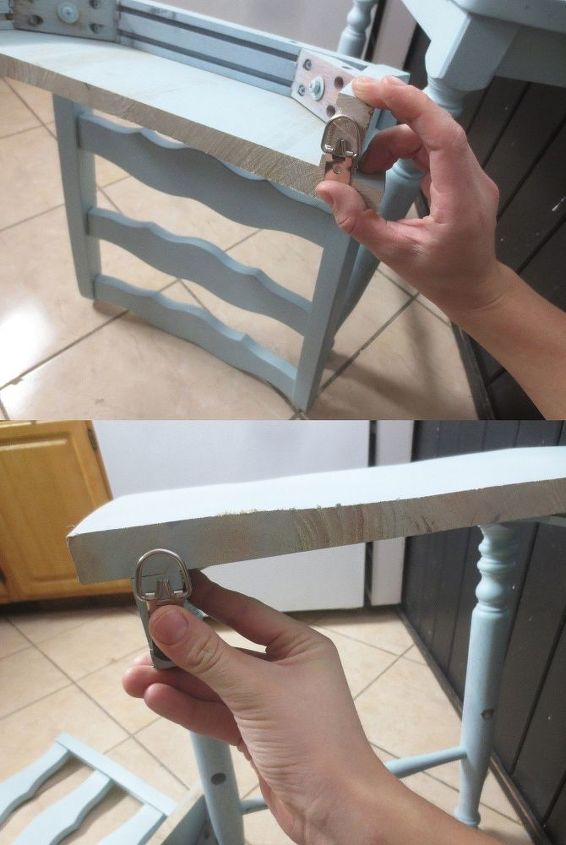 STEP 7: Attach hanging hooks
Now you can attach some hanging hooks to the back of your shelves. For the top piece of the chair you will attach them to the edge of the seat where you cut through.
For the bottom chair piece you will attach the hooks to the back of the chair seat.
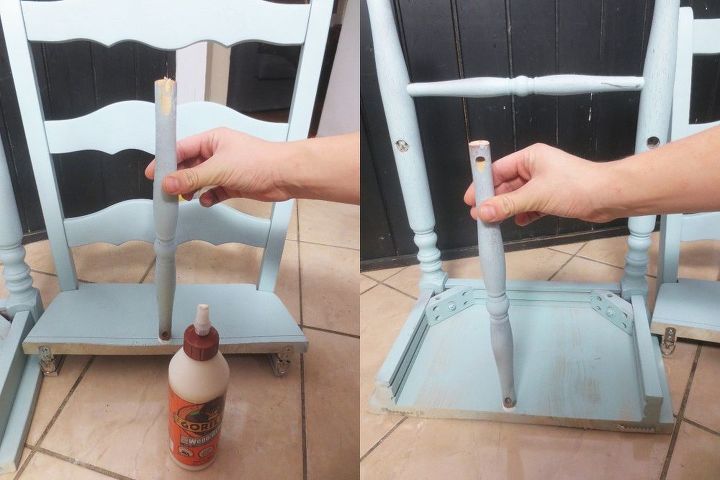
Take the chair rails you cut earlier and using wood glue and screws, screw them to the shelves so they will rest against the wall when hung. These will serve as brackets, so that they rest evenly and the front of the shelf doesn’t fall forward.
STEP 9: Add L brackets (optional)
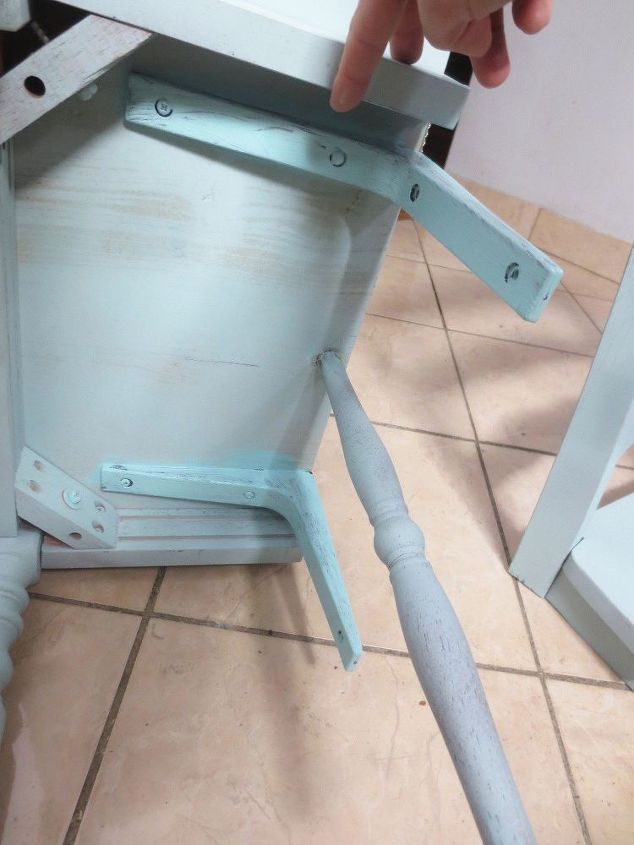 Because the bottom portion of the chair-turned-shelf was cut with a wider shelf, the rail bracket was not strong enough to bear the weight. So I added two actual brackets to the bottom of the chair and painted them to match. You may need brackets for either shelf depending on the weight of your chair and how far it rests away from the wall.
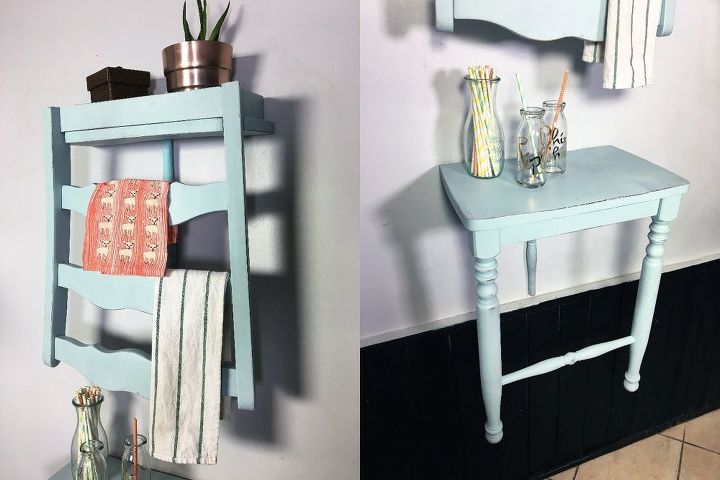 STEP 10: Hang your shelf and rack
Now simply hang your shelves and fill them up as you wish!
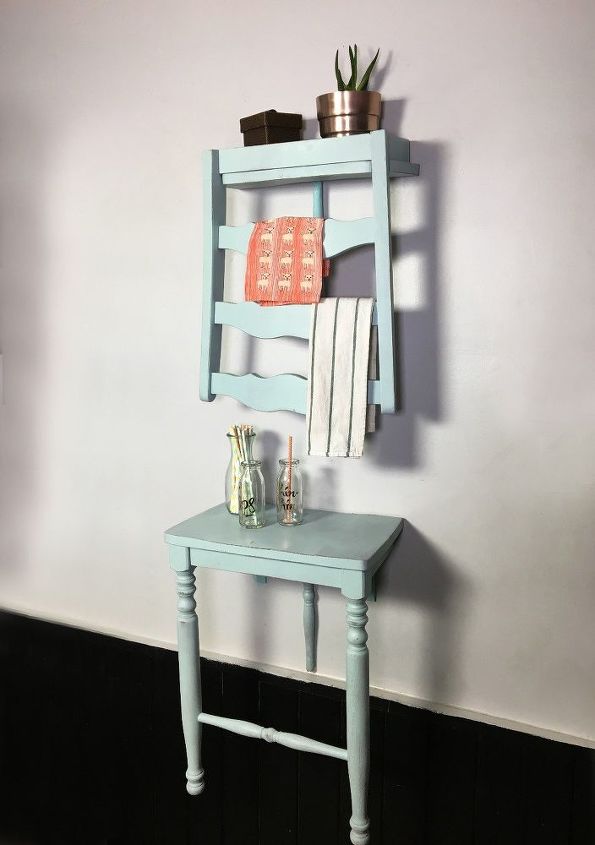 If you set the shelves one above the other they, make for a cute make-shift bar/prep space in the kitchen! You could also hang a mirror from the ladder rungs of the top shelf and make it a vanity!
These shelves are perfect for towels to hang from, but can really be used for a multitude of things!
We want to help you DIY, so some of the materials in this post are linked to sellers. Just so you know, Hometalk may collect a small share of sales from the links on this page.
Want more details about this and other DIY projects? Check out my blog post! GO